Best. Soup. EVAH!!!
This is the first time I made Cream of Chicken soup, but because I had my family over, I made a huge pot because I know how much my family enjoy soup. But amazingly, every drop of it was gone... even the bowls I set aside for my cousin to ta-bao, and the serving that was meant for my nephew (who wasn't able to make it for dinner) were given over to the second and third helping requests.
And yes, my daughter even said, "So yummy! Can you made this soup again?"
So to safe-keep the memory of how to make this soup, I'm putting up the recipe here. ;)
Ingredients:
2 Boneless Chicken Legs with Skin
2 tbsp Butter (I use butter for the flavour, but you can use olive oil too)
2 medium-sized Onions, chopped
3 stalks of Celery, sliced thinly
2 Russett Burbank Potatoes, diced
1 Carrot, cut into strips
1.5L Chicken Stock
1L Water
Dried herbs: Dried Oregano, Dried Basil, Crushed Black Pepper
Salt to taste
1 tbsp Flour
1 can, Nestle Cream
Method:
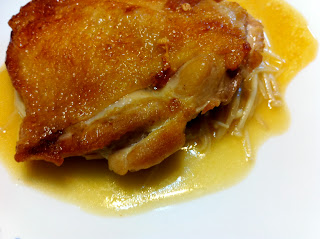
- Fry the Chicken Leg skin-side down in the Happy Call Pan, on low-medium heat for 3 minutes, to allow the chicken fat to come out. Keep the pan closed.
- At the end of 3 minutes, open the HCP to see if the skin is cooked golden. If it is, then use a tong to turn the chicken to cook the other side for 2 minutes. Keep the pan closed because to enable the chicken to cook without drying out. Once this is done, set the cooked chicken aside and DO NOT throw away the chicken oil. (If you don't have a HCP, you can fry the chicken in a normal pan, but make sure your pan is covered to prevent oil splatter. The alternative would be to bake the chicken first, but with the skin side up... but same principle, don't throw away the drippings because that's where the chicken taste is. It might be more work to use a large oven for only 2 chicken legs; or having to clean up a toaster oven for cooking the chicken legs one at a time, which is why the HCP is more efficient for this recipe. ;) )
- Whilst the chicken is cooking, put the butter in a pressure cooker pot, and sweat the onions on low heat. When the onions have turned translucent, throw in the potatoes and celery and stir it in. When the potatoes are coated in oil, add in the carrots, chicken stock, most of the water AND the two fried chicken legs. Add in the dried herbs and a bit of salt. (Not too much salt because we would still need to adjust the salt at the end of the soup.)
- Close the pressure cooker and cook for 15 minutes. (Initially, I would have used the thermal pot and cooked this much earlier - at least 2 hours for the veggies to get soft. However, my mother-in-law gifted me with an 8L pressure cooker, so I decided to try it out instead. ;) If you don't have either the thermal pot or a pressure cooker, you can also stove-top-cook the soup until the celery and potatoes are softened - about an hour. But do remember that in stove-top-cooking, water evaporates much more, so you may have to add more water to account for the water loss.)
- While the pressure cooker is cooking the soup, add the flour into the HCP at medium to low heat, to mix with the chicken oils to form a roux. Essentially, fry the flour evenly until you see the flour bubbling, and it gives a biscuit-like scent. Then lower the heat and add in the rest of the water a little at a time, until you get a brown sauce gravy. It is this flavourful gravy that will thicken the soup.
- When the soup is done, remove the 2 chicken legs and allow it to cool before shedding the chicken meat and put it aside. (You don't need the skin any more... although my kids fight to get the skin because it's just so yummy and chewy...lol!)
- Add the gravy into the pot and stir until the soup thickens a bit.
- At this moment, the soup is still very chunky, so remove about half to 3/4 of the soup and blend it in a blender.
- Add about a ladle of the soup to the cream and stir it to mix well. Once all the cream has been mixed into the soup, pour the mix into the pot.
- Finally, add the shredded chicken meat to the soup and warm it up to allow the soup to thicken and mix its flavours. At this point, add salt to taste, and you're done! :)
Serve it with warm toasted bread. Or just slurp it all up on its own. I'm sooooo going to make this again and again, because it's really worth every step. :)
 |
| "So yummy! Can you made this soup again?" |


