Thursday 17 May 2012

Junior Cake Chefs!


The week after the Cookie Decorating class for No.3, I held a Cake Decorating class for No.2's class.

Their cooking brief was simple: to decorate a cake given to them into one of the 4 transports they've learnt as part of their module on Transportation.

I first got the kids to discuss and plan on paper how best to cut their cake into a 3D version of the transport (Car, Plane, Ship or Train), and how they would decorate it.

Next, I showed them the resources they will be given for decorating the cake: buttercream frosting, Smarties, Rolled Biscuits, and Oreos.

Then the kids got down to decorating their cakes... and eating it too! ;)

Here are the highlights:
The cakes in the box, the ziploc packets of buttercream frosting, Oreos, Smarties and Rolled biscuits.  All the kids are given are cake board and a butter knife, and are taught knife safety. :)
How many of you like chocolate cakes?
Great plan.  Now how should we cut the rectangle cake to get the design we want?
So the next step is?
Plan done.  Now to get the decorative bits!

Cutting the cake to assemble. 
It's beginning to take shape.
What does this look like? ;) 
More frosting, please!
Messy fun!
See our sticky hands?
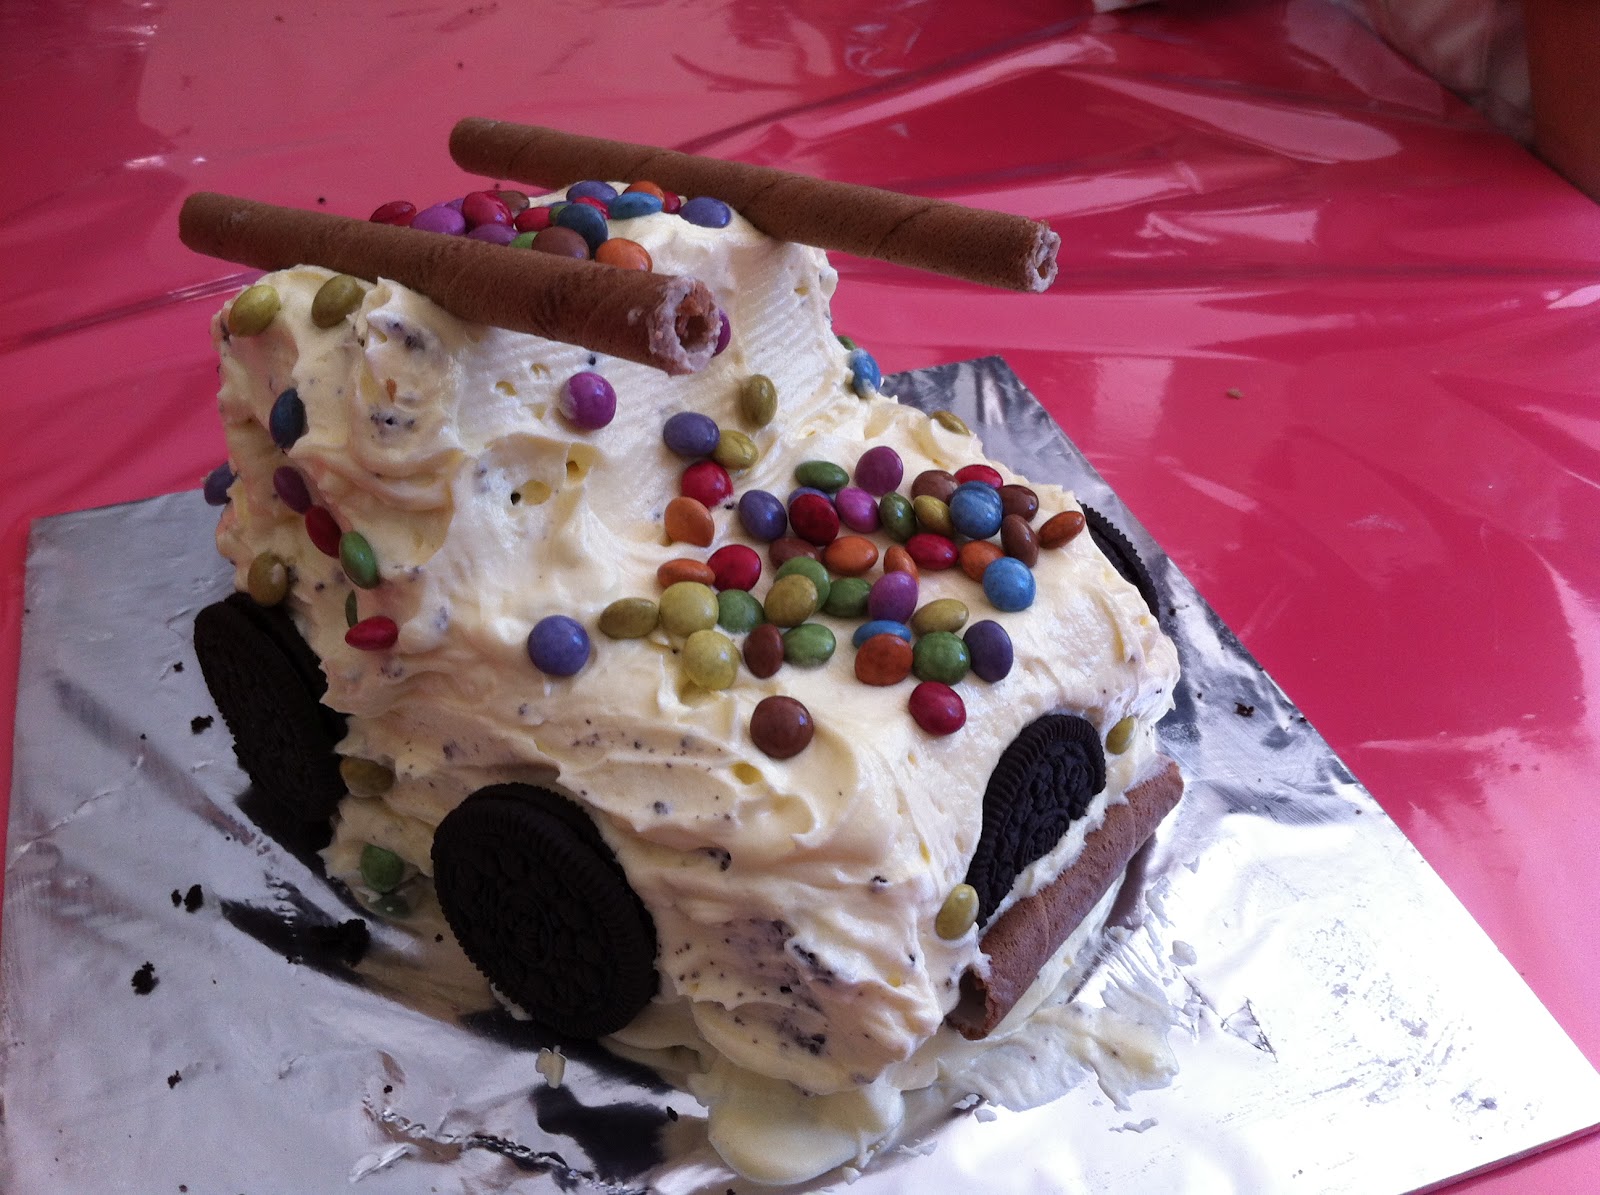
Morning class' CAR.
Morning class' SHIP.
Morning class' PLANE.
Morning class' TRAIN.
Yummy!
Afternoon class' turn at decorating.
Afternoon class' CAR.
Afternoon class' SHIP.
Afternoon class' PLANE.
Afternoon class' TRAIN.

Say 'Cakes!'
Yum!
Yay!


The recipe for the chocolate cake can be found here, which is my favourite go-to chocolate cake recipe.  I just baked in an 8x8-inch square cake tin, and cut it into 2; half for each of the group.  Because that was a busy week for me in terms of work, I wrapped the cake in baking parchment, and then in plastic wrap and froze all 4 cakes, defrosting them in the fridge the night before the session.

The buttercream frosting I used was a simple one, but with the Kitchenaid beating it, the texture was really, really good.


Buttercream Frosting
Ingredients:
1 block unsalted butter, softened
1 teaspoon vanilla extract
2.5 cups confectioners' sugar
2 tablespoons milk


Directions:

  1. In a mixer, cream the butter and vanilla.
  2. Add in the sugar, one cup at a time, beating well after each addition.
  3. Beat in the milk, and continue mixing until light and fluffy. 
  4. Keep frosting covered until ready to decorate.

I just scooped the frosting into ziploc bags and put it in the fridge.  Because of our tropical weather, the frosting gets pliable quite easily, but it holds relatively well nonetheless.  When the kids need the frosting, I just cut a corner of the bag and the kids can pipe it onto the cake and use the butter knife to spread the buttercream.

Another Rainbow Cake... Steamed!


Rainbow cakes are such fun to eat... and these are much easier to make than the baked version.

Call me a lemming, but when I saw this recipe being circulated on my Facebook, I just couldn't resist trying it out. :)

The original recipe can be found here.

Steam Rainbow Cake
Ingredients:
6 Eggs
200g Sugar
2 tsp Vanilla Extract (or almond extract or lemon juice or whatever flavour you prefer or have on hand)
280g Cake Flour, sifted, and add in ¼ tsp salt
200ml Coconut Cream/Milk (from packet.  I used Kara brand.)
Liquid food colouring

Method:
  1. Prepare wok steamer. Line an 8" round tin. 
  2. Beat eggs with sugar and vanilla until the mixture increases in volume and is pale in colour.  I beat the mixture with the Kitchenaid from medium to high speed for about 10 minutes.
  3. LIGHTLY fold in a third of the flour, then half the coconut cream, another third of the flour, the last of the coconut cream and finally the last of the flour.
  4. Ladle the batter into 7 bowls and colour with the liquid food colouring.  I found that gel food colouring doesn't work well because to incorporate the gel into the batter required a lot of stirring, and that resulted in the batter losing all those precious air bubbles which makes the difference between a light cake and a denser cake.
  5. Pour the bottom-most colour (Reddish-Purple) into the cake tin, and then give it a light bang on the counter.  This is to allow the batter to flatten evenly as well as to remove the larger (and uglier) airpockets.
  6. Put the cake tin in the wok steamer and steam for 5 minutes on medium heat.
  7. Remove cake tin from wok steamer and pour in the second layer (Bluish-Purple), and spread the batter evenly with the back of a spoon.  Then bang the cake tin lightly on the counter and put the cake tin back into the wok steamer.  Steam for 4 minutes on medium heat.  Repeat until all layers are done.  For the final layer (Red), steam for 15 minutes before removing from the wok.
  8. Remove cake from the cake tin unto a wire rack and leave to cool. 
My preference is still the baked Rainbow Cake.  Slicing into the white frosting, revealing the hues of the rainbow is a lovely surprise, and any cake with frosting is a lovely treat. :)

Nonetheless, this is a quick and easy version - no messy frosting, and a quick and clean snack that will appeal to both young and old.  Best of all is that more people have the means to steam a cake than to bake one - especially families without an oven. ;)

Wednesday 2 May 2012

Panda-monium Pand Bread


This was an utterly cute bread-making project!

The bread was soft and yummy, but what made the entire project special was cutting into the loaf to reveal a Panda looking out at you, from a field of green.  And no two Panda bread look the same (nor does each slice for that matter!) - after all, the proving of the bread is organic, and there's no guarantee that during the proving the Panda would look like what it would. :)

The method for making Panda bread can be very easily picked up here:
The video is in Cantonese, but the video is well-made and breezy... it was clear that the ladies had lots of fun making this bread. :)  No bread machines were used, so do try it out.

If you'd like to try making this bread, I'm posting the recipe below, with my modifications in brackets:

Panda Bread

Ingredients
300g Bread Flour (I used mix of atta flour and plain flour to get 300g on the kitchen scale... that's why my Panda's a little more brown than white. ;) )
30g Sugar
Milk + 1 egg yolk = 210g
3/4 tbsp salt
18g unsalted butter, softened (I used salted butter.)
1 tbsp green tea powder mixed with 2 tsp hot water (I used 2 tsp of Chlorophyll powder because that was the only green colouring I had on hand; you could use green food colouring instead if you have them on-hand)
8g cocoa powder
1/2 sachet active dried yeast

Method:

  1. Beat the egg-milk mixture lightly, and then microwave it for about 30 sec.  Add sugar and yeast and leave the liquid for 10 minutes to froth.  If the mixture doesn't froth after 15 minutes, your liquid is probably too hot, which killed the yeast, or the yeast has expired.  If there's froth, your dough will definitely rise. ;)
  2. In a bowl, mix the flour and salt.  Add in the liquid and butter, and stir everything until it comes together.
  3. Knead into dough ball in bowl and then pour out onto a floured countertop and knead for at least 8 minutes until the dough is smooth and elastic.
  4. Divide dough into 3 portions: One portion is a half; then from the leftover half, divide into thirds, and cut out a third.  You should get 1/2 (big), 1/3 (medium), 1/6 (small) pieces.
  5. The Big portion, colour it green.  I used Chlorophyll powder, but you could use green tea powder or even green food colouring. Once the colour is kneaded through, roll it into a ball, grease it and then cover it to rest.
  6. The medium portion, leave it plain - this would be the white face of the Panda.  Just roll it into a ball, cover and rest.
  7. The smallest portion, colour it with the cocoa powder.  If you're out of cocoa powder, you could use black food colouring.  There are those who would use charcoal powder too, which is available in the baking shops here.  Once kneaded through, roll it into a ball, cover it and rest.
  8. Place all 3 doughs in a warm place to rise until they are doubled it size.  I usually put my doughs to prove in the oven with a bowl of warm water to create a warm atmosphere.  This first proving takes about 30mins to 2 hours - but essentially, you're waiting for the dough to double in size.
  9. After the dough has risen, cut the black dough into 4 equal pieces, green dough into 2 pieces (1/3 and 2/3), and the plain dough into 2 pieces (3/5 + 2/5).
  10. Begin with the largest green dough piece. (See Video, about 4.21min mark.) Roll it out into a rectangle that would fit into your loaf pan, and then place the longish green dough piece in the centre, followed by 2 of the black pieces by its side.  In the video, the lady rolled out the 2 black doughs, then sliced off a bit of the green dough and put that piece in the centre.)  The first layer is essentially the same idea.
  11. Next, roll out the larger white piece in a rectangle and place this over the first layer.  Then roll the other white piece and place it in the middle of the white dough like this:
  12. Place 2 long rolls of black dough at the sides of the middle piece, and then seal up this portion with the larger rectangle piece along the top.
  13. Finally, seal the entire loaf with the green dough in like manner.  (See the video.) Make sure the dough seals in everything.
  14. Prove the loaf until it is doubled in size, then bake in a pre-heated oven at 200deg C, for about 25 to 30 mins.

Ta-da!

Into lunch bags...

No two Pandas alike!

Happy Panda-fun!