Thursday, 10 May 2007

Chocolate Cupcakes

Mini-cupcakes

An intriguing debate in baking is difference between Cupcakes and Muffins. Whilst the two yummy baked goods look similar, they are differentiated by the method of baking, texture and perhaps also the way they are eaten.

A cupcake is essentially a small cake. Therefore, to gain the moniker of a cake, the method usually involves creaming the butter with sugar to get a light, fluffy texture for the cake. Additionally, the ingredients are mixed into a smooth texture. Muffins, on the other hand, involves mixing the dry and wet ingredients, to get a lumpy batter; too smooth, and the muffin doesn't taste as good.

For me, muffins are usually unfrosted and eaten warm. Cupcakes, like cakes in general, are usually frosted and eaten cold.

Frosted Cupcakes

This particular recipe hails from allrecipe.com, by Ladan Miller. I've reduced the amount of sugar needed slightly, but I must say that this chocolate cupcake is both simple to make and absolutely chocolatey and delicious.

Chocolate Cupcakes

Ingredients:
1 1/3 cups all-purpose flour (171g)
1/4 teaspoon baking soda
2 teaspoons baking powder
3/4 cup unsweetened cocoa powder (96g)
1/8 teaspoon salt
3 tablespoons butter, softened (43g)
1 1/3 cups white sugar (268g)
2 eggs
3/4 teaspoon vanilla extract
1 cup milk

Method:
1. Preheat oven to 175 deg C. Line a muffin pan with paper or foil liners.
2. Sift together the flour, baking powder, baking soda, cocoa and salt. Set aside.
3. In a large bowl, cream together the butter and sugar until light and fluffy. Add in the eggs one at a time, beating well with each addition, then stir in the vanilla. Add the flour mixture alternately with the milk; beat well.
4. Fill the muffin cups slightly more than 1/2 full.
5. Bake for 15 to 17 minutes in the preheated oven, or until a toothpick inserted into the cake comes out clean.
6. Frost with your favourite frosting when cool.

Frosted Mini-cupcakes

This recipe works well with both minicupcake liners and larger cupcake liners. Also, it tastes great a day after baking, retaining its moisture.

A simple frosting for the kids to use is to whip up some whipping cream with icing sugar to taste. Let the kids have fun decorating the cups with piping swirls and sugared bits available from baking shops. Chocolate rice and Hundreds & Thousands (or Fairy sugar) make great decorations too.

Or just bake the cupcakes and have a birthday cake with a difference - let the kids have the fun decorating their own birthday cakes with a candle in honour of the birthday kid!

ETA (20/11/07): You can also decorate your cupcakes with fondant (sugarpaste/gumpaste) figurines. Joyce has an entry in her blog about a sharing session we had at my place with this cupcake recipe.

ETA (20/04/2011): If you want domed cupcakes, fill your cups to 3/4, and heat your oven to 205 deg C. When you put your cups in the oven and close the door, reduce the heat to 175 deg and bake until done. The initial high heat helps make the cupcakes dome up.
If you want a flatter cupcake, fill your cups to slightly more than 1/2 the cup and preheat and bake your cups at 165 deg C. This takes longer to bake, but you'll get a flatter cupcake.

Thursday, 3 May 2007

Spaghetti Carbonara

Watching late night Food Channel is a terrible torture. Watching all those delicious food, so simply cooked by celebrity chefs like Jaime Oliver, Nigella Lawson and their peers easily create a desire to run out at 1am to the nearest food centre and indulge in a hot, hot plate of char kway teow to stem the tide of hunger. heh.

That said, watching the ease of chefs in preparing food is also inspiring. You keep thinking - is that all there is to make that? That's so simple!

The following recipe is adapted from David Rocco's cooking series, Dolce Vita. His programme tries to tell as story each episode, as he weaves cooking and good food into daily Italian life.


Spaghetti Carbonara (for One)

Ingredients:
A little Extra Virgin Olive Oil
1 slice Bacon, cut into 1cm x 1cm pieces
100g Spaghetti
1 egg, separated
1/3 cup milk
1/3 cup grated cheddar cheese
Black Pepper

Method:
1. Cook spaghetti in rapidly boiling water.
2. Put egg white, milk, cheddar cheese and lots of black pepper in a bowl.
3. In a saucepan, put a little olive oil to fry the bacon. You may fry a little minced garlic along with the bacon if you wish.
4. When spaghetti is done, add the spaghetti to the bacon in the saucepan, and give it a stir. Immediately, lower the heat and add in the cheese mixture. Stir until the spaghetti is coated with the cheese mixture.
5. Serve the spaghetti with the egg yolk on top, eat immediately. The egg yolk will cook on contact with the hot spaghetti - YUMMY! Garnish or serve with some steamed veggies, like broccoli or french beans.

When cooking for more, just increase the amounts accordingly.

My family loves this, and to me, it's an Italian version of eating dry instant noodles. The ingredients for this are usually found in the fridge. If we don't have bacon at the ready, there's always luncheon meat or sausages.

Wednesday, 2 May 2007

Chicken Pie

One of our favourite meals is the humble Chicken Pie. There's something just wonderful cutting into a pie, releasing that delectable aroma of whatever's underneath the pie crust.

Chicken Pies also make great gifts or potluck items because they travel well, and disposable pie tins ensures that you don't need to wait around to collect the serving dish. *winks*

This pie crust recipe comes via Leelee Hugbear. It's very special because of the inclusion of yoghurt, which gives the crust a lovely aroma and a non-oily feel.

Pie Art? Nah, just leftover pie crust, cookie cutters, and a whole lot of imagination! *hee*
A Mini Version

Chicken Pie (with Yogurt Pie Crust)

Pastry for 9" Pie
Ingredients:
200g butter

250g plain flour

1 tsp sugar
1 egg yolk
1/2 tsp salt
110g plain yoghurt

Method:
1. Put all the ingredients into the mixing bowl except yoghurt, and mix to a crumble.
2. Add in yoghurt and mix to a dough.
3. Refrigerate dough for at least 30 mins to harden.


Chicken Pie Filling
Ingredients:
350g diced potatoes
1 cup water (2 half cups)
1/2 tsp salt
1 big onion, diced

50g frozen mixed vegetable
1 can of Button mushrooms, sliced
2 chicken fillets, diced
1 tbsp corn starch mixed with 2 tbsp water
1 tsp oregano flakes
1 tsp basil flakes
1 hard-boiled egg, sliced, or 4 hard-boiled quails' eggs, halved, or 8 hard-boiled quail's eggs, whole

Method:
1. Heat abt 2 tbsp of oil and fry potatoes with 1/2 cup of water and salt until soft, then set it aside.
2. In a clean wok, heat 2 tbsp oil and fry the onion until transparent.
3. Add in the mixed vegetable, mushroom and chicken. Fry for a while to break up chicken.
4. Add in the potatoes.
5. Add in another 1/2 cup of water and simmer for about 5 mins.
6. Add in the cornstarch and stir to thicken mixture.
7. Add in the basil and oregano. Stir and then set aside for later use.

Assembling the Chicken Pie
1. Split the pie dough into half, if making the large pie, or divide the dough into smaller amounts required. Keep the dough which is not in use in the refrigerator.
2. Roll out the pie dough between baking paper until the size is large enough to cover the bottom and sides of a pie dish. Don't worry if there is a tear; fix it by pressing leftover dough into the tear. Use a fork and poke some holes into the pie base so that the pie can breathe. You wouldn't want your pie to explode! *winks*
3. Put 1/2 of the filling on top of the pie base. Arrange the eggs evenly on the fillings and then cover the eggs with the rest of the fillings.
4. Roll out another pie dough to cover the top. Crimp the sides of the pie to seal the top crust with the sides of the base dough. Decorate the pie with leftover pie dough, if any.
5. Poke some holes on the top crust with a fork to allow the steam in the pie to escape. At this point, you can refrigerate or even freeze the pie until needed. If freezing, ensure that the pie is well wrapped to prevent freezer burns. Just thaw the frozen pie in the fridge until required.
6. Before baking, give the top crust an egg wash to ensure a lovely warm browned crust. Brush the pie with 1 beaten egg.
7. Bake the pie in a preheated oven at 180 deg C for 30 mins.

Enjoy!

Monday, 30 April 2007

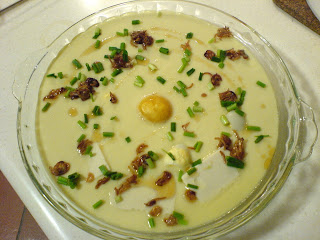
Chinese Style Steamed Eggs

Oh, this is one dish that is so easy to make, but so delicious with rice. The egg turns out as smooth as silken toufu, with a savoury, fragrant aroma.

In addition, you can add whatever ingredients to the egg mix you fancy - it only depends on what's available in your fridge, and what your tastebuds clamour for.

I've got two recipes here, but the basic steam egg preparation is as follows:
1. 1 egg to 100ml of water (or Chicken stock. The amount is 1 egg to 100ml of liquid.)
2. Pepper and Salt to taste
3. A bit of Chinese cooking wine for fragrance
4. Fried shallots, a teaspoon of sesame oil and spring onions for garnishing.

The method is to simply beat items 1-3 and pass the mixture through a sieve into a dish for steaming. The sieve will remove most of the bubbles so that you get a smooth texture for the egg. After that, you can then arrange the other ingredients you want into the dish.

Finally, the crucial step is in the steaming of the egg itself. Make sure that the dish is covered when steaming. This helps prevent water condensing onto the egg mix, and scarring it; ensuring a shine to the egg. Steam with a very low flame - which means that you should not hear the rapid boiling of water that you usually do when steaming other dishes. Steam until the egg is set, which can be between 15-20 minutes, depending on the amount you made and the size of your wok/steamer.

You can check whether the egg is set by using a knife and poking the centre of the dish. It's done when the egg doesn't run.

Steamed Eggs with Mushroom and Toufu
Ingredients:
3 Eggs
200ml water
100ml Chicken stock (I use the liquid Knorr Chicken stock from the box.)
1 tsp Hua Tiao cooking wine
Pepper and salt to taste
2 dried Shitake mushroom, soaked to soften and sliced
1 box Silken Toufu

Method:
1. Assemble the egg mix as explained above.
2. Arrange the mushroom and toufu as desired.
3. Cover the dish and steam for about 15 to 20 minutes on a low fire, until the egg is set.
4. Garnish with fried shallot, sesame oil and chopped spring onions. You might want to garnish with sliced fresh chilli if you like it spicy.

Steamed Eggs with Quails' Eggs and Toufu

Ingredients:
3 Eggs
200ml water
100ml Chicken stock (I use the liquid Knorr Chicken stock from the box.)
1 tsp Hua Tiao cooking wine
Pepper and salt to taste
6 Quails' Eggs, hardboiled and shelled
1 box Silken Toufu
1 Salted egg yolk

Method:
1. Assemble the egg mix as explained above.
2. Arrange the toufu and quails' eggs as desired. You don't have to stop at 6 eggs - any number is fine. *winks* Put the salted egg yolk in the centre of the dish.
3. Cover the dish and steam for about 15 to 20 minutes on a low fire, until the egg is set.
4. Garnish with fried shallot, sesame oil and chopped spring onions. You might want to garnish with sliced fresh chilli if you like it spicy.


The list of ingredients to add to the egg is really up to the imagination. You might want to try:
  • Crabsticks
  • Button mushrooms
  • Sliced fish (like threadfins)
  • Sliced fish cakes (especially those cute Japanese patterned ones)
  • Sliced meat (marinated with a little light soy sauce for between 10 to 30 minutes)
  • Gingko nuts
  • Wolfberries
  • Broccoli
  • Carrot strips

Saturday, 28 April 2007

Mango Cake

Ah, Mango Cake - so light, so sweet, so mango-y!

Ethan once said that mangoes got a taste that causes his tastebuds to dance excitedly; how true and how aptly described.

This recipe is by way of a wonderful cook, Leelee Hugbear, whom I aspire to be kitchen-wise and in being kitchen-wise. heh. She has a wonderful cooking blog here.

Mango Cake (Based on Leelee's recipe from M4M's archive)

The Sponge Cake
Ingredients:
4 eggs
100g castor sugar
100g cake flour
12g cake stabilizer/Ovalette
20ml water
1/2 tsp mango essence
90g melted butter

Method:
1. Line a 9”x9” square cake tin.
2. Beat all ingredients except melted butter at high speed for about 6 mins or until creamy.
3. Add in butter to the mix and mix well.
4. Bake at 200 deg C for 10-15 mins.

This will yield a cake about an inch in height. Don't worry if it's too flat; the mango mousse filling will give height to the cake later. Allow the cake to cool, then prepare the mango filling when you are ready to assemble the cake.

The Mango Filling
Ingredients:
300g mango puree (about the size of an average honey mango, puréed in a food processor)
13g gelatine powder
1/2 tsp mango essence
a few drops of yellow colouring
300g dairy whipping cream

Method:
1. While processing the mango, add in the gelatine powder. Then boil the mango mix until the gelatine is dissoved. Leave it to cool down.
2. Whip up the whipping cream. Add the cooled mango mix, the essence and colouring and mix the lot well.


Assembling the Cake, Part 1
1. Prepare an 8" cake ring.
2. Use the cake ring and press it onto the sponge cake. Cut the cake to fit into the ring, and then half the cake height-wise. You should get two 8" circles of cake.
3. Put the topmost cake, brown-side down into the cake ring.
4. Pour about 1/4 of the Mango Filling onto the cake in the ring.
5. Add in slices of mango onto the filling.
6. Pour another 1/4 of the Mango Filling on top of the mango slices, making sure that all pockets of air are filled.
7. Put the next slice of cake on top of this layer.
8. Pour the rest of the Mango Filling on top of this cake layer and smoothen the filling out as much as possible.
9. Allow the cake to chill in the refrigerator for at least 2 hours. Overnight chilling would be best.

Assembling the Cake, Part 2:
1. Once you unmould the cake ring, you get:
2. I whipped up about 150g of whipped cream with some icing sugar for taste to frost the sides of the cake:
3. I decorated the cake with mango slices to my fancy. Using cookie cutters, I pressed out flowers from slices of mangoes. I wanted a 'mosaic' effect for the cake, so it was diamonds and squares and triangles to cover the top. It's actually up to your creativity to decorate the cake.
Leelee also suggests either glazing the mangoes with a simple apricot glaze (apricot jam + water, boiled then cooled) to give the fruit a shine, or before unmoulding the cake to set the top layer of the cake with mango slices in agar-agar jelly.

And here's a view of the different layers of the Mango Cake. Yummy!

A friend suggests that I try this out with durians the next time I bake... and I'm thinking about strawberries as well! This is quite a moderately simple baking project - do give it a try.

Saturday, 24 March 2007

The Finger Food Post

Edna celebrated her first birthday recently (Has it really been a year? *whew*), and we had a party at home for her. Well, the party was in her name, but I suppose it's more a party for the other members of the family because the guests were invariably Noel's friends or Ethan's pals. Edna took it all rather well, though. She had lots of chickpeas to munch on, so she didn't mind the crowd ooh-ing and aah-ing over her antics. *grins*

So, party food!

This is certainly an easy-to-make finger food that can be made in advance. All it requires to be ready is to be popped into the oven and heated up before serving.


Bacon Wrapped Quails' Egg

Ingredients:
Bacon Slices
Quails' Eggs
Cheddar Cheese
Cucumber

Method:
1. Boil Quails' Eggs so that they become hard boiled. Shell the eggs and put them aside.
2. Slice the cucumbers thick, then cut them into half. The cucumbers are meant to act as a base to hold the skewered bacon roll in place.
3. Slice the Cheddar Cheese, and cut the slices about the size of the egg.
4. Wrap a bacon slice around the egg and cheese, skewering the bacon with a toothpick. (See picture above)
5. Push the toothpick through the bacon wrapped egg into a slice of cucumber like so:
6. When required, put the bacon wrap into the oven at 200 deg C for about 10 to 15 minutes, or until the bacon sizzles and the cheese melts.
7. Serve hot!

And yes, before you mention it, this isn't exactly a healthy food item. *winks*
But it's a party, and it's a treat.


A healthier version of the bacon roll would be the cocktail sausages. This is another finger food item that can be made in advance of parties since it's served cold.


Cocktail Sausages
Ingredients:
Chicken Cocktail Sausages
Cheddar Cheese
Canned Pineapple
Cucumber

Method:
1. Cut cucumber into small cubes, removing the seeds. Likewise, cut the cheese and pineapple slices about the same size of the cucumber.
2. Skewer the ingredients together with a toothpick.

Voilá! Enjoy!

Wednesday, 7 March 2007

Another Bread Post: Roti John


Roti John has a very interesting history. It was invented in Singapore in 1976 by an enterprising Muslim hawker named Shukor, whose Caucasian expatriate clientéle frequenting his stall at the Taman Serasi Hawker Centre beside the Botanic Gardens, always ask him to fry up an onion omelette to eat with a side order of french loaf. Shukor decided one day to fuse the onion omelette together with the bread that voilá! Roti John was born.

Why Roti John? Well, roti is Malay for bread... and John? Well, at the time, all Caucasians were generically called John. *grins* So in honour of Shukor's clients, he named them Roti John.

The added minced/slices of beef/mutton came slightly later, but you'll be hard-pressed now if you were to find any hawker selling Roti John sans meat.

So here's the recipe:

Roti John
Ingredients:
100g minced beef
1 large onion, chopped
3 eggs
Salt and Pepper to taste
1 loaf crusty french bread, sliced like a subway sandwich, then cut to fit into frying pan

Method:
1. Mix the minced beef, chopped onion, eggs, salt and pepper together.
2. Heat up a frying pan with about a tablespoon of cooking oil.
3. Scoop the beef mix onto a piece of bread.
4. Quickly press the bread, beef-side into the hot oil. Hear the pan sizzle. Smell the aroma of the oil meeting the egg and onions. Use a spatula and give the bread a good press down and then flip it over to make the crust crispy.
5. Remove from the pan and slice the bread smaller if needed.

Serve with Sweet Chili Sauce.

Sweet Chili Sauce
Ingredients:
About 3 tablespoons of Chili Sauce
About 1 tablespoon of Ketchup
About 1 tablespoon of Sugar
About 3 table spoons of Water

Method:
1. Mix all the ingredients together. The mix should be a bit runny rather than thick.

We made Roti John for Edna's first Birthday party last week, and it was a favourite with our guests. We made chicken curry to accompany the Roti John.