Saturday, 24 March 2007

The Finger Food Post

Edna celebrated her first birthday recently (Has it really been a year? *whew*), and we had a party at home for her. Well, the party was in her name, but I suppose it's more a party for the other members of the family because the guests were invariably Noel's friends or Ethan's pals. Edna took it all rather well, though. She had lots of chickpeas to munch on, so she didn't mind the crowd ooh-ing and aah-ing over her antics. *grins*

So, party food!

This is certainly an easy-to-make finger food that can be made in advance. All it requires to be ready is to be popped into the oven and heated up before serving.


Bacon Wrapped Quails' Egg

Ingredients:
Bacon Slices
Quails' Eggs
Cheddar Cheese
Cucumber

Method:
1. Boil Quails' Eggs so that they become hard boiled. Shell the eggs and put them aside.
2. Slice the cucumbers thick, then cut them into half. The cucumbers are meant to act as a base to hold the skewered bacon roll in place.
3. Slice the Cheddar Cheese, and cut the slices about the size of the egg.
4. Wrap a bacon slice around the egg and cheese, skewering the bacon with a toothpick. (See picture above)
5. Push the toothpick through the bacon wrapped egg into a slice of cucumber like so:
6. When required, put the bacon wrap into the oven at 200 deg C for about 10 to 15 minutes, or until the bacon sizzles and the cheese melts.
7. Serve hot!

And yes, before you mention it, this isn't exactly a healthy food item. *winks*
But it's a party, and it's a treat.


A healthier version of the bacon roll would be the cocktail sausages. This is another finger food item that can be made in advance of parties since it's served cold.


Cocktail Sausages
Ingredients:
Chicken Cocktail Sausages
Cheddar Cheese
Canned Pineapple
Cucumber

Method:
1. Cut cucumber into small cubes, removing the seeds. Likewise, cut the cheese and pineapple slices about the same size of the cucumber.
2. Skewer the ingredients together with a toothpick.

Voilá! Enjoy!

Wednesday, 7 March 2007

Another Bread Post: Roti John


Roti John has a very interesting history. It was invented in Singapore in 1976 by an enterprising Muslim hawker named Shukor, whose Caucasian expatriate clientéle frequenting his stall at the Taman Serasi Hawker Centre beside the Botanic Gardens, always ask him to fry up an onion omelette to eat with a side order of french loaf. Shukor decided one day to fuse the onion omelette together with the bread that voilá! Roti John was born.

Why Roti John? Well, roti is Malay for bread... and John? Well, at the time, all Caucasians were generically called John. *grins* So in honour of Shukor's clients, he named them Roti John.

The added minced/slices of beef/mutton came slightly later, but you'll be hard-pressed now if you were to find any hawker selling Roti John sans meat.

So here's the recipe:

Roti John
Ingredients:
100g minced beef
1 large onion, chopped
3 eggs
Salt and Pepper to taste
1 loaf crusty french bread, sliced like a subway sandwich, then cut to fit into frying pan

Method:
1. Mix the minced beef, chopped onion, eggs, salt and pepper together.
2. Heat up a frying pan with about a tablespoon of cooking oil.
3. Scoop the beef mix onto a piece of bread.
4. Quickly press the bread, beef-side into the hot oil. Hear the pan sizzle. Smell the aroma of the oil meeting the egg and onions. Use a spatula and give the bread a good press down and then flip it over to make the crust crispy.
5. Remove from the pan and slice the bread smaller if needed.

Serve with Sweet Chili Sauce.

Sweet Chili Sauce
Ingredients:
About 3 tablespoons of Chili Sauce
About 1 tablespoon of Ketchup
About 1 tablespoon of Sugar
About 3 table spoons of Water

Method:
1. Mix all the ingredients together. The mix should be a bit runny rather than thick.

We made Roti John for Edna's first Birthday party last week, and it was a favourite with our guests. We made chicken curry to accompany the Roti John.

Wednesday, 28 February 2007

The Bread Post: Garlic Bread

Garlic Bread

We make our own Garlic Spread - it's not difficult at all, and it jazzes up plain bread so easily.

Garlic Spread

Ingredients
100g Butter (left out for a while so that it softens)
5 pieces Garlic (or more if you really like the garlic)
1/4 tsp Dried Oregano Flakes
1/4 tsp Dried Basil Flakes
Salt to taste
A dash of Paprika (optional - and any other herbs or spices you enjoy)

1. Put all the ingredients into a chopper or blender and hit the switch.
2. Once the garlic pieces are pluverised, use a spoon and mix the spread more evenly.
3. Spread the Garlic Butter on any bread and pop it into an oven until you can smell the garlic aroma.
4. Serve the Garlic Bread with soup.

The Garlic Spread can be made beforehand and kept in the fridge until needed. While the spread can go on any bread, we love it on crusty French loaves.

Wednesday, 21 February 2007

Chocolate Shortbreads

Q: What do you get when you combine a very rich, thick, butter cookie with chocolate?
A: A little bit of heaven in your mouth!

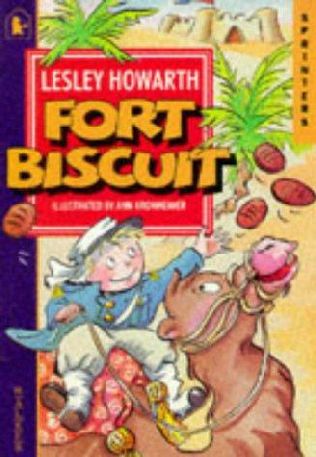
This particular recipe did not come from an internet search engine, nor from an online forum. This recipe came from a children's book that Ethan borrowed from his school library. The book is called "Fort Biscuits" by Leslie Howarth.

Ethan insisted that we try out the very simple cookie recipe at the end of the story, and because it was so simple, and because we literally had all the ingredients at hand, we did. Since then, I've made quite a few batches of this delicious biscuit/cookie. Essentially the biscuit is a Chocolate Shortbread. It crumbles in your mouth into a chocolatey goodness! And YES, flavanols in chocolates have been found to be good for both the brain. Yummy brain-food, anyone?

Although the recipe actually calls for the biscuit to be rolled into balls and pressed into shape with a fort fork, I've found that using a cookie cutter makes the biscuit very pretty. Since I was baking this for Chinese New Year on Valentine's Day, I decided to use the heart-shaped cookie cutter to get this:
Pretty hearts all in ready for the ovenA mouthful of heaven in every bite!

Fort Biscuits (Chocolate Shortbread)

Ingredients
180g butter or margarine
60g icing sugar
120g plain flour
60g cornflour
30g cocoa powder
½ tsp vanilla essence

Method
1. Preheat oven to 190°C
2. Cream butter and sugar.
3. Add flour, cornflour and cocoa powder.
4. Add vanilla essence.
5. Knead into a soft dough.
6. Roll dough into walnut sized balls.
7. Place on baking tray and press down lightly with wet fork.
8. Bake for 12-15 minutes.
9. Dust with icing sugar when cooled.
10. Store in an air-tight container when biscuits are cooled thoroughly.


The chocolate shortbreads go very well with a tall glass of ice-cold milk or milo.

Excuse me while I brush chocolate crumbs off my laptop. Smile


Tuesday, 20 February 2007

Nuts! It's Steamed!


I love eating steamed chickpeas because they are such a cheery snack. They're my guilt-free snack, full of yummy goodness. I pack some for Ethan to take to school for recess, and he shares it out with his friends. Edna loves eating chickpeas as well, and would growl (yes, literally growl) if we don't feed her with it fast enough!


Steamed Chickpeas

Ingredients
1 Packet/1 Cup uncooked chickpeas (can be obtained from dry goods section at any supermarket)
1 Stick of cinnamon (optional - I just like the cinnamon for a kick)
Salt to taste
Water, at least 3 times the amount of chickpeas used

Method
1. Soak the chickpeas in the water with salt and the cinnamon stick for at least 4 hours. Overnight is perfect. Make sure that the chickpeas have expanded.

2. Put chickpeas with the soaked water (enough to cover the chickpeas) in a bowl and steam it in a steamer for 1 to 2 hours.

3. Strain the chickpeas and remove the cinnamon stick.

Vóila! Chickpeas done. Enjoy the guilt-free snack! Very Happy


I've suggestions for soaking the nuts with tumeric instead of cinnamon. My granny used to do that, and tumeric gives the nuts a lovely yellow colour. However, tumeric stains, so if you're using it, soak the chickpeas in a metal container.

My family loves chickpeas also because if you look at a chickpea, you can see it looks like a little chick-head.

Friday, 16 February 2007

My Favourite Cotton Cheesecake Recipe

There are a lot of Japanese Cotton Cheesecake Recipes online, with a variety of methods and ingredients. What I like about this recipe I found is its simplicity. So far, it appears that this recipe uses the least amount of ingredients, and the least steps. (Can you tell? I like zen-cooking! *grins*)

Made for Christmas 2006

Made for Chinese New Year 2007

This cheesecake tastes great with fruits, so I decorated it with sliced peaches and marachino cherries for Chinese New Year... I figured the colours of the peaches and cherries were excellent for the season, and the abundance of fruits herald a fruitful year ahead.

Another view of the CNY Cheesecake


Cotton Cheesecake

Ingredients
7 ounces cream cheese, at room temperature (If you're using the block, divide the block into 8 equal parts. They will be exactly 1 ounce each)
1/4 cup whole milk
1/2 cup superfine sugar (caster sugar; separate the sugar into two 1/4 cups)
3 eggs, separated
1/4 cup cornstarch (don't use plain flour!)
2 tablespoons lemon juice
1/2 teaspoon cream of tartar
2 1/2 cups boiling water

For the glazing
2 tablespoons jam (Apricot or Strawberry)
1/2 tablespoon water


1. Preheat oven to 175 deg celsius.
2. Prepare an 8-inch cake tin, line the bottom of the tin with baking paper and grease the entire tin with a bit of cooking oil. (I use Canola Oil Cooking Spray, available from Phoon Huat.)
3. Beat cream cheese with milk to soften.
4. Add half of the sugar, egg yolks, cornstarch and lemon juice.
5. Beat until smooth.
6. Beat egg whites in a separate bowl until foamy.
7. Gradually add remaining sugar and cream of tartar to the egg white, beating until soft peaks form, about 8-10 minutes.
8. Put about 1/3 of the egg whites into the cream cheese mixture, stirring gently.
9. Pour the new cream cheese mixture into the egg whites and fold in gently.
10. Pour into cake pan and smooth the surface.
11. Place cake pan into a larger roasting pan and place in lower rack of oven.
12. Pour enough water into the roasting pan to come half way up the side of the cake pan.
13. Bake 40-45 minutes, until a pick inserted in the middle of the centre comes out clean.
14. If the surface becomes too dark while baking cover with a piece of tin foil, but be careful not to open the oven door until it has been in the oven for at least 20 minutes.
15. You can eat like this, or you can put jam/glaze on top of it.

Glaze
1. Put the jam in a sauce pan with the water on a low heat and warm up until it's melted.
2. Then spread the glaze on top of the cake.

The recipe originated from www.recipezaar.com.


The cake will rise and fall a little after cooling, but the texture is light and yummy. I added chopped peaches into the glaze mixture for the CNY version.

Wednesday, 14 February 2007

Macaroni and Cheese Cupcakes

This is a new twist on an old favourite - Mac 'N Cheese in Cupcakes!

This recipe is fabulous because you can make the macaroni and cheese in advance, and pop them into the cupcakes and into the oven when needed. It's a great party food for both kids and adults.
Mac 'N Cheese in Cupcakes

Ingredients:
2 cups milk
2 tbsp plain flour
1 1/2 cup grated Cheddar cheese (separate into 1 cup and 1/2 cup)
1/2 cup grated Mozzarella cheese
200g elbow macaroni, cooked and drained

Method:
1. Preheat oven to 180ºC.

2. In a saucepan, dissolve flour to 1 cup of milk, stirring constantly until all flour lumps have dissolved. Add the remaining milk, stirring thoroughly.

3. Place saucepan on stove and simmer 15 minutes, stirring occasionally, until sauce thickens. (This is a Bechamel base; a typical 'white sauce' base for most pasta dishes.)

4. Add in the 1 cup of Cheddar and 1/2 cup of Mozzarella into the saucepan and stir until the sauce is blended. Add more milk if sauce is too thick; more grated cheddar if sauce is too thin. (You can add more cheese if you like it cheesier).

5. Add macaroni, stirring gently to coat well.

6. Line muffin tin with paper muffin cups and place one scoop of mac and cheese mixture into each muffin cup. Top with reserved 1/2 cup grated Cheddar. Bake for 15 minutes or until golden brown. Let cool for 5 minutes before serving.

-OR-

6. Coat oven-safe dish with butter or oil and scoop mac and cheese mixture into the dish. Top with reserved 1/2 cup grated Cheddar. Bake for 15 minutes or until golden brown. Let cool for 5 minutes before serving.

OPTIONAL:
1. Add sliced button mushrooms or diced ham or bacon or french beans to give zest to the dish.
2. Top off with a dash of paprika, and dried basil or oregano.


I usually add the spices to give the cupcakes more 'colour'. I've made the Mac 'N Cheese Cupcakes for Ethan's birthday party and the kids love it. I made 2 versions - plain (which the kids love) and with button mushroom (which their parents love). Just allow about 5 minutes more in the oven if made in advance and taken out cold from the fridge.