Showing posts with label biscuits. Show all posts

Friday, 20 April 2012

Butter Cookies and a Sugar Icing Class

No. 3 couldn't resist dipping into the icing for a lickity lick! :)
No. 2 and 3's school has asked me to give a cookery class for the kids of their level.  After discussions with the form teachers, I've decided that since No. 2's class was on the topic of Transportation and No. 3 on the topic of Shapes, to create a cookery class based on those themes.

No. 3's lesson was this morning.  I've decided that instead of having them use cookie cutters to cut out shapes of triangles, squares and circles, to make it 'easy' and time efficient to get them to ice cookies with shapes instead.

Icing requires the Nursery kids (4-year-olds) to activate their fine motor skills - not that easy a task.  But no matter... it was the sensory experience of taste this cookery class was about, and in which playing with food a key factor! ;)

To this end, I decided that the smaller the child, the bigger the cookie needs to be.  So I made square cookies the size of a slice of bread for each child to use as an edible icing board.

It was not easy at first to look for a rolled cookie recipe that enabled me to cut and bake that size of a rolled dough.  The first recipe I used from Allrecipe was too sticky and melted very fast in our hot weather.  Furthermore, it was almost impossible to cut and move out a large square cookie shape.  In the end, I found a butter cookie recipe that worked well.  However, I had issues with transferring the cut-cookie to the baking tray, until I hit upon an idea which I've made a photo-tutorial after the Butter Cookie Recipe:

Butter Cookie Recipe

Ingredients:
(For about 11 bread-slice-size squares... I'd suggest halving this recipe if you're making it for home.)
450g Plain Flour
2 tsp Baking Powder
200g Butter
210g Sugar
2 eggs
2 tsp Vanilla Extract

Methods:

  1. Sift flour and baking powder. Set aside.
  2. Cream butter and sugar until butter lightens.
  3. Add eggs one at a time. Add vanilla extract.
  4. Add flour and beat on very very low speed for 10 seconds. You only want the flour to gather and form a dough - not create gluten. The lighter the forming, the better the texture of the cookie. At this point, I put the dough in a plastic wrap and put it in the fridge to harden a bit before rolling out.
  5. Bake 180deg C for 10 minutes, then turn tray to even out the baking for another 4 minutes. Cool on rack.


Cutting the Bread-Slice-Sized Cookie:

Cut the silicon-coated baking sheet to a size slightly larger than the cut-cookie size.  Sprinkle icing sugar on it to help prevent it from sticking.

Put some cookie dough on top of that, and sprinkle more icing sugar on top.

Place another sheet of the baking paper over that to roll out.

Using a rolling pin with a height guide (this one is about 0.5cm) helps tremendously!

I used an air-tight container that's square-shaped to cut the cookies.  Dip the edge into the icing sugar to help prevent the dough from sticking to it.

Make sure that the rolled dough is larger than the square box.

Remove the excess dough.

Ta-da!  What the dough looks like after removing the box.

Then put the entire cut-cookie dough on the baking tray.  This way, you don't have to handle the cookie by tranferring onto the tray.

When the tray is filled, use cookie cutters to press in shapes so that the kids can ice, following the lines.  Or just leave it blank for the kids to use their imagination in icing.  I didn't have square or triangle cutters, so I used a butter knife to form the shapes. :)  You can also use a toothpick to draw lines or pictures etc.  This helps later in icing.

These are done baking.

A close up.

The lesson today was really simple and fun.  I taught the kids how to make icing.  Of course, the icing were pre-made and coloured and put into tiny ziploc bags that I bought from Daiso (70 pieces for S$2!).  When the kids need to ice, I just cut a tiny hole at the corner of the bag, and the kids are good to go.

Icing Sugar Recipe
Ingredients:

(This is sufficient to make 4 packets of colour.  I used double this recipe to make 8 packets of the same colour because there are 8 groups to prepare for - 4 each for AM and PM class.)
120g confectioners' sugar/icing sugar
20g milk
24g light corn syrup
Food colouring gel

Directions

  1. Put all the ingredients except the food colouring gel in a small bowl, and stir together until it comes together.  If needed, thin the mix with the addition of milk, half a teaspoon at a time.  If you're going to use liquid colouring, add this to the ingredients before you start thining the icing with milk.  You may also add flavouring extract if you want - almond or rose, or lemon would be good.  If you're going to add extract, again, hold off thining with milk until you used the extract first.
  2. Separate the mix into different bowls to add the gel colouring of choice.
  3. Spoon the icing into tiny ziploc bags and cut the edge to enable piping.  Otherwise you may add a little more milk to the icing to make it a thick paint - use a paintbrush to help paint on a design to your cookie.


The icing in the rectangle packs - Red, Yellow, Green, Blue and Purple.  The lesson was making Orange... mixing a dot of red gel and yellow gel. :)

The kids tracing the shapes with the icing... of course with adult help! Then after they got the shape, it was really up to them how they wanted to decorate their cookie.

I love how their tiny hands measured up to the cookie. :)  I helped this girl play with the idea of the square as a window. :)

Tune in next week for No. 2's class - cake decoration! :)

Tuesday, 17 January 2012

Pineapple Tarts

The Sign that Chinese New Year is upon us!
The reason for my video on the rubbing in method with a pastry blender is simple - I've been making pineapple tarts! :)

I can't remember when I began making pineapple tarts for Chinese New Year, but I know that the recipe that I've only ever used is the one belonging to Joyce aka Dutchess-of-Cookalot.

She has a recipe for the pineapple jam, but I prefer to use the ready-packs available at Phoon Huat, and tweak them.

But her recipe for the pastry!!! OH!

I love her pastry recipe for its simplicity and result.  There are so many recipes out there with ingredients like custard powder, milk powder, corn flour, and even cheese!  And in a myraid of teaspoonfuls and half teaspoonfuls that clutters what is a very simple shortbread pastry.

The whole pineapple tart eating experience after baking these all these years is simple:
Enough crunch and crumbly buttery pastry, to enhance the chewy, fragrant, sweet-sourish, sticky mouthfeel of the pineapple jam.  A hint of spices hits the nose.  And all in one satisfying mouthful of pineapple tart.

The effort put into such a satisfying endpoint is certainly worth it.  And with a bit of organisation, making these wonderful festive biscuits isn't that difficult.

The Pineapple Jam (To be prepared a day in advance)
Ingredients:
1 packet AAA Pineapple Paste from Phoon Huat (This gives a sweet-sourish taste)
1 packet Premium Pineapple Paste from Phoon Huat (This gives a smoother texture to the overall jam)
2x 1.5" sticks of Cinnamon
10 cloves
1 Star Anise
Hot Water (about 1/2 cup - depends on how firm you want the overall jam to be)

Method:

  1. Mix all the ingredients in a large microwave safe bowl.  I use a pastry cutter to mix my ingredients because of the hot water, and when it's sufficiently cooled, I get my hands in there to squish the jam and spices together.
  2. Microwave the mixture for about 3 minutes to get hot, but not cooking.  Then leave it aside to cool down.
  3. Put it in the fridge overnight for the spices to enhance the jam further.


Once that's done, I roll 1 measuring teaspoonful of the jam, making sure to remove any black bits (stems of the pineapples) or spices that might be in the jam.  These pineapple balls are put onto a large tray, in neat rows, and then the tray is wrapped in clear plastic before returning to the fridge.
Jam in neat rows, and all the other parts of the tarts in progress

The Pastry (To be made a day in advance)
I usually make the pastry a day in advance to give it sufficient time to rest.  Also, because the weather is hot, the pastry can be very tricky to punch out, so preparing the pastry ahead and allowing it to cool sufficiently is a good idea.

Ingredients:

340g Plain Flour
½ tsp Salt
1 tbsp Icing Sugar
250g Butter, cold (I used unsalted, but if you're using salted, you may reduce the amount of salt in the recipe)
1 Egg Yolk
25ml Ice-cold Water
1 tsp Vanilla Essence

Rolled Pineapple Jam

1 Beaten Egg+Water, for glazing

Method:

  1. Put salt in the bowl, then sift flour and icing sugar into it. Rub in cold butter until mixture resembles breadcrumbs (See video).
  2. Mix in the egg yolk, ice-cold water and essence. Mix well to form a dough. Place in a plastic bag or plastic box and chill in the refrigerator for at least 30 minutes.  I usually leave it overnight. 
  3. Roll pastry out to 0.5 cm thickness between 2 baking papers, and either cut out or punch out the pineapple tart mould with a tart cutter.  Place the tarts on a lined baking tray.
  4. Return the tart to the freezer to harden.  This way, when glazing with the egg wash, the tart doesn't lose its shape.
  5. After the egg wash, fill each piece of cut-out pastry with the rolled pineapple jam filling.  Lightly shape the pineapple jam so that it sits nicely in the pastry, and the tarts look uniform.
  6. Bake in preheated oven at 180°C for at least 20 minutes.  If you want a more golden look to the tarts, reduce the temperature to 170°C and continue to bake for another 5 minutes or until you achieve the colour you want.  Then remove the tray and allow the tarts to cool before storing in air-tight containers.
I use a punch mould.

After freezing the tarts, I apply an egg wash.  By the time the tarts are glazed, the pastry is softened by the heat.

After putting the pineapple jam balls on the glazed tarts, it's ready to go into the oven.

Ta-da!  Time to cool down and store in airtight boxes.

But beware of Knaves of Hearts, who will steal your tarts! ;)

Have a blessed year of baking and cooking and sharing your bounties with your family and loved ones! :)

Pastry Cutter/Blender

My first video demonstration! ;)

Please (try to) ignore the background sounds.  Edna was practising on her piano, and Ezra was playing with the pots and pans... *sighs*

This demonstration is on the use of a pastry cutter to rub in cold butter into flour for making shortbread pastry and piecrust pastry.  To achieve light and crumbly pastry, cold butter (and cold cold ingredients, especially water) are necessary to prevent the butter from melting.

Here's the video, beginning with a block of butter from the fridge:

Sunday, 23 October 2011

Almond Biscotti

I just bought a Dolce Gusto to make lovely lovely Cappucino at home.  And what better to accompany that perfect cup of coffee than a slice of crisp, almond biscotti?


I had this recipe for ages - ripped off a Popular Bookshop Magazine, POPclub, years ago, but never had the impetus to actually make the biscotti until today. :)

I'm retyping the entire recipe here, and will comment on it after:

Ingredients:
120g Plain flour (sifted)
a pince of salt
3 egg whites
100g caster sugar
1tsp vanilla essence
180g unblanched almonds

Method:

  1. Beat egg whites with salt until form.  Gradually add in castor sugar and vanilla essence.  Beat until it thickens.
  2. Add in flour and almonds.
  3. Spread mixture into a well-greased 18cm by 18cm square tin.
  4. Bake for 20 to 25 min at 170degC until light brown.
  5. Remove and place it on a wire rack to cool.
  6. Wrap dough with foil and keep for 2 days under room temperature.
  7. Cut the dough into thin layers, and place a single layer onto a baking tray.
  8. Bake in oven 160degC for 12 to 15 minutes or until it is dry and crispy.
Comments:
I didn't have 3 egg whites - only two because I used the yolk for baking 2 pies.  Therefore, I reduced all the ingredients proportionally.  Also, I didn't have a 18cm by 18 cm square tin, and so I used a 16cm circle tin, which I sprayed with oil.

After baking and cooling, I wrapped the cake/bread in an aluminium foil, and put it into a non-airtight plastic box because I was concerned about ants. ;)  After 2 days, I sliced into thin (but I think I could slice it even thinner if I had a sharper knife... too lazy then to sharpen it. ;P) slices and pop it into the oven.  It took longer than 15 minutes to get crispy, but the texture is nice - not very sweet - and perfect to pair with a hot cup of aromatic coffee. :)

Sunday, 4 April 2010

Rose Meringue Cookies


These cookies are so simple to make and they taste so sweet and light.

Ingredients:
90g Egg White
175g Caster Sugar
1/2 tsp Cream of Tartar
1 tsp Rose Essence
2-3 drops red food colouring

Method:
1. Beat egg white in mixer until frothy, then add in the cream of tartar.
2. Beat the egg white until soft peak appear, then add in the sugar tablespoon by tablespoon so that it mixes in and dissolves. You'll want your egg white to look stiff and glossy.
3. Add in the essence and colouring.
4. Pipe the egg white onto a lined baking sheet in swirls to look like rosettes.
5. Bake in a pre-heated oven at 120 deg celsius for about 60 minutes, turn off the oven and leave it in there for another 60 minutes.

Store in an air-tight container.

You could make variations of these meringue cookies, limited by your store of essences and imagination. Instead of rose essences, you could use lemon or lemon essence for a lemony meringue cookie. Just remember that it's a sweet treat, so your essences need to have a citrusy base or a fruity base to work. ;)

Amaretti


These are delicious Italian Almond biscuits made with ground almond, egg white and sugar - no flour, so they're gluten-free! =)

I had lots of egg whites frozen from my CNY bakes, so it was a cinch to make these cookies for Easter.

Ingredients:
60g Egg White
250g Ground Almond (bought from Phoon Huat)
200 grams Castor Sugar that has been processed through the food processor
1/2 teaspoon Almond Essence (optional)

Method:
1. In a mixer, add the ground almond and castor sugar and mix for 1 minute.
2. Into the mixer, add the egg white in 3 batches, until everything comes together.
3. Roll the sticky dough, teaspoonful by teaspoonful onto a lined baking tray.
4. Pop it into a pre-heated oven at 190 degrees C, for about 5 minutes, or until the cookies have risen, are a deep golden color and have tiny cracks.
5. Remove from the oven and cool on a rack. When cool gently peel cookies from the baking paper. If they stick, turn the paper over, take a damp paper towel and gently wipe the bottom of the parchment paper to loosen the cookie.

Recipe adapted from: http://www.joyofbaking.com/AmarettiCookies.html

This cookie keeps well and usually taste better a few days after baking... if they can last that long. ;p

Wednesday, 23 April 2008

Rainbow Cookie

I teach Sunday School and sometimes, baked goods play a role in my lessons. Since I was archiving some of my lessons on the Sunday School blog, I thought to share these recipes here too. :)


This one is very simple to make, since there really isn't a need to make multiple cookies - just a huge one or two would do. ;)

I got this recipe from here.

  • 1 cup sugar
  • 1 cup butter, softened
  • 2 cups flour
  • 1 tsp. vanilla
  • 1 egg
  • Food coloring-with red, blue and yellow you can make all the other colors.
1. Mix sugar, butter, egg and vanilla. Add flour and mix well.
2. Divide dough into six balls.
3. Add a different food coloring to each ball.
4. Roll each ball in a snake shape onto a floured surface. (I put the dough into a cookie press and formed a long line with it. The dough is very soft because of the butter, so if you're rolling, put it in the fridge to harden first before doing so.)
5. Arch snake shape and press onto cookie sheet.
6. Add other snake shapes until the rainbow is formed. Red on the outermost, Orange, Yellow, Green, Blue, Indigo (bluish-purple), and Violet (reddish-purple).
7. Bake at 180 deg Celsius for about 8-15 minutes.

=====

Uses:

1. Use the cookie in a lesson on God's Promise. (It goes great with Hillsong's Kids' "Rainbow" as an object lesson.)
2. "Taste and see that the Lord is Good!" Ps 34:8
3. Use the cookie in a lesson on sharing (since the cookie has to be broken into pieces to share.)

Wednesday, 21 February 2007

Chocolate Shortbreads

Q: What do you get when you combine a very rich, thick, butter cookie with chocolate?
A: A little bit of heaven in your mouth!

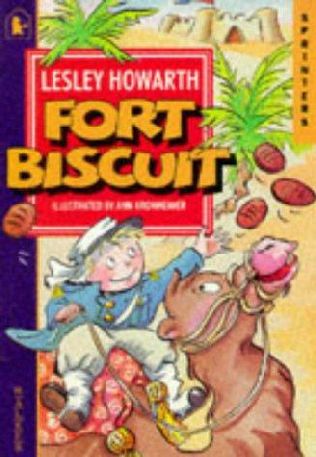
This particular recipe did not come from an internet search engine, nor from an online forum. This recipe came from a children's book that Ethan borrowed from his school library. The book is called "Fort Biscuits" by Leslie Howarth.

Ethan insisted that we try out the very simple cookie recipe at the end of the story, and because it was so simple, and because we literally had all the ingredients at hand, we did. Since then, I've made quite a few batches of this delicious biscuit/cookie. Essentially the biscuit is a Chocolate Shortbread. It crumbles in your mouth into a chocolatey goodness! And YES, flavanols in chocolates have been found to be good for both the brain. Yummy brain-food, anyone?

Although the recipe actually calls for the biscuit to be rolled into balls and pressed into shape with a fort fork, I've found that using a cookie cutter makes the biscuit very pretty. Since I was baking this for Chinese New Year on Valentine's Day, I decided to use the heart-shaped cookie cutter to get this:
Pretty hearts all in ready for the ovenA mouthful of heaven in every bite!

Fort Biscuits (Chocolate Shortbread)

Ingredients
180g butter or margarine
60g icing sugar
120g plain flour
60g cornflour
30g cocoa powder
½ tsp vanilla essence

Method
1. Preheat oven to 190°C
2. Cream butter and sugar.
3. Add flour, cornflour and cocoa powder.
4. Add vanilla essence.
5. Knead into a soft dough.
6. Roll dough into walnut sized balls.
7. Place on baking tray and press down lightly with wet fork.
8. Bake for 12-15 minutes.
9. Dust with icing sugar when cooled.
10. Store in an air-tight container when biscuits are cooled thoroughly.


The chocolate shortbreads go very well with a tall glass of ice-cold milk or milo.

Excuse me while I brush chocolate crumbs off my laptop. Smile


Tuesday, 6 February 2007

Golden Bamboos (Cheese Sticks Biscuits)

More Chinese New Year preparation sort of recipes. This cheese stick biscuits (cookies, if you're American *winks*) , is a recipe from a Moderator, Jam, from moms4moms.org. Moms4Moms is a forum for Singapore parents and topics on the board range from dealing with children to family issues to lifestyle issues. The forums' cooking and baking threads are always a chockful of interesting recipes to try out - especially familiar family favourites.

I like Jam's recipe because it doesn't contain any salt - the grated cheddar cheese is already salty in itself, and the baked cheese flakes gives the biscuits a nice crunch. Besides, the golden sticks look great for CNY particularly because they look like little bamboos - and this being the year of the Pig, with the bamboos ('zhu') sharing the same sound as 'Pig', Golden Bamboos and Golden Piggies sounds appropriate, doesn't it? *grins*


Egg Wash and Sprinkled Grated Cheese

Golden Bamboos all ready for munching!

Golden Bamboos (aka Cheese Sticks Biscuits)

Ingredients
200 gm butter
1 egg
325 gm of flour (sifted)
40 gm of corn flour (sifted)
150 gm of grated cheddar cheese
1 teaspoon of vanilla essence

1. Beat butter and egg in a mixer till creamy, then add in the vanilla essence, the flour and the cornflour. Mix well.

2. Add in the grated cheese and continue mixing till all are evenly mixed.

3. Roll the dough into long strips. Cut the strips into about 1 1/2 inches (see picture) and place it onto a baking tray lined with baking paper.

4. Prepare an egg wash of 1 egg+1/4 tsp yellow colouring. Coat all the strips with the egg wash. (You can omit the yellow colouring, but the sticks will look a little pale.)

5. Grate more cheddar cheese and sprinkle over the strips.

6. Bake in a preheated oven of 180 deg Celsius for 18-20 minutes.


The cheese biscuit dough can actually be made into any shapes according to the fancy of the baker. Jam recommended using a cookie cutter to shape it. I suppose this is one recipe that can be versatile for many occasions, and is certainly a very kid-friendly project to do. The dough is malleable enough for smaller hands to get involved without creating too much of a mess. And the result is a biscuit packed with calci-yum for those growing bones. *grins*