Showing posts with label snacks. Show all posts

Thursday, 17 May 2012

Junior Cake Chefs!


The week after the Cookie Decorating class for No.3, I held a Cake Decorating class for No.2's class.

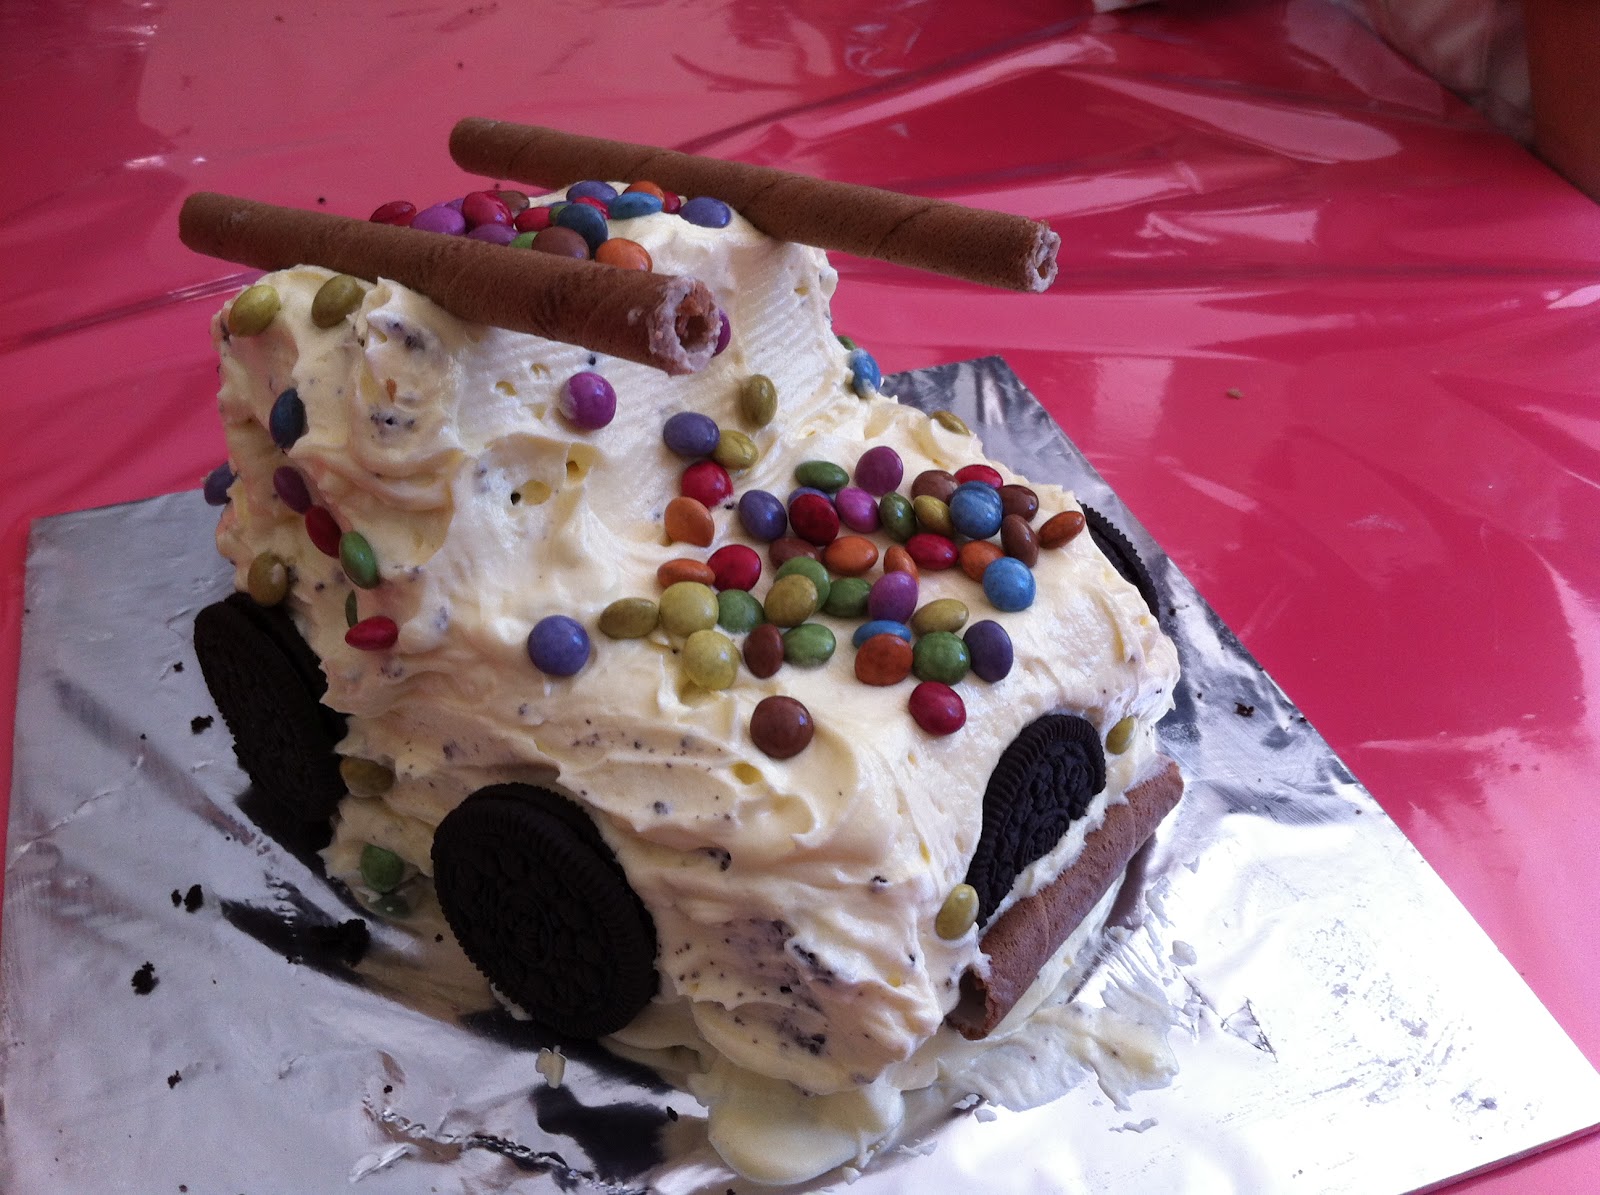
Their cooking brief was simple: to decorate a cake given to them into one of the 4 transports they've learnt as part of their module on Transportation.

I first got the kids to discuss and plan on paper how best to cut their cake into a 3D version of the transport (Car, Plane, Ship or Train), and how they would decorate it.

Next, I showed them the resources they will be given for decorating the cake: buttercream frosting, Smarties, Rolled Biscuits, and Oreos.

Then the kids got down to decorating their cakes... and eating it too! ;)

Here are the highlights:
The cakes in the box, the ziploc packets of buttercream frosting, Oreos, Smarties and Rolled biscuits.  All the kids are given are cake board and a butter knife, and are taught knife safety. :)
How many of you like chocolate cakes?
Great plan.  Now how should we cut the rectangle cake to get the design we want?
So the next step is?
Plan done.  Now to get the decorative bits!

Cutting the cake to assemble. 
It's beginning to take shape.
What does this look like? ;) 
More frosting, please!
Messy fun!
See our sticky hands?
Morning class' CAR.
Morning class' SHIP.
Morning class' PLANE.
Morning class' TRAIN.
Yummy!
Afternoon class' turn at decorating.
Afternoon class' CAR.
Afternoon class' SHIP.
Afternoon class' PLANE.
Afternoon class' TRAIN.

Say 'Cakes!'
Yum!
Yay!


The recipe for the chocolate cake can be found here, which is my favourite go-to chocolate cake recipe.  I just baked in an 8x8-inch square cake tin, and cut it into 2; half for each of the group.  Because that was a busy week for me in terms of work, I wrapped the cake in baking parchment, and then in plastic wrap and froze all 4 cakes, defrosting them in the fridge the night before the session.

The buttercream frosting I used was a simple one, but with the Kitchenaid beating it, the texture was really, really good.


Buttercream Frosting
Ingredients:
1 block unsalted butter, softened
1 teaspoon vanilla extract
2.5 cups confectioners' sugar
2 tablespoons milk


Directions:

  1. In a mixer, cream the butter and vanilla.
  2. Add in the sugar, one cup at a time, beating well after each addition.
  3. Beat in the milk, and continue mixing until light and fluffy. 
  4. Keep frosting covered until ready to decorate.

I just scooped the frosting into ziploc bags and put it in the fridge.  Because of our tropical weather, the frosting gets pliable quite easily, but it holds relatively well nonetheless.  When the kids need the frosting, I just cut a corner of the bag and the kids can pipe it onto the cake and use the butter knife to spread the buttercream.

Sunday, 23 October 2011

Almond Biscotti

I just bought a Dolce Gusto to make lovely lovely Cappucino at home.  And what better to accompany that perfect cup of coffee than a slice of crisp, almond biscotti?


I had this recipe for ages - ripped off a Popular Bookshop Magazine, POPclub, years ago, but never had the impetus to actually make the biscotti until today. :)

I'm retyping the entire recipe here, and will comment on it after:

Ingredients:
120g Plain flour (sifted)
a pince of salt
3 egg whites
100g caster sugar
1tsp vanilla essence
180g unblanched almonds

Method:

  1. Beat egg whites with salt until form.  Gradually add in castor sugar and vanilla essence.  Beat until it thickens.
  2. Add in flour and almonds.
  3. Spread mixture into a well-greased 18cm by 18cm square tin.
  4. Bake for 20 to 25 min at 170degC until light brown.
  5. Remove and place it on a wire rack to cool.
  6. Wrap dough with foil and keep for 2 days under room temperature.
  7. Cut the dough into thin layers, and place a single layer onto a baking tray.
  8. Bake in oven 160degC for 12 to 15 minutes or until it is dry and crispy.
Comments:
I didn't have 3 egg whites - only two because I used the yolk for baking 2 pies.  Therefore, I reduced all the ingredients proportionally.  Also, I didn't have a 18cm by 18 cm square tin, and so I used a 16cm circle tin, which I sprayed with oil.

After baking and cooling, I wrapped the cake/bread in an aluminium foil, and put it into a non-airtight plastic box because I was concerned about ants. ;)  After 2 days, I sliced into thin (but I think I could slice it even thinner if I had a sharper knife... too lazy then to sharpen it. ;P) slices and pop it into the oven.  It took longer than 15 minutes to get crispy, but the texture is nice - not very sweet - and perfect to pair with a hot cup of aromatic coffee. :)

Thursday, 23 June 2011

Orange Cake in a Blender


When I first saw this cake baked by a lovely lady, I was intrigued - a cake that was made in a blender!  Jam's photography made the cake look so drooling-good that I knew I had to try my hands at making this cake... and what an utterly quick and easy cake to make it turned out to be!  If you can measure out the ingredients, mix in the flour, and pop it into the oven, you're well on your way to savouring this cake! ;P


Orange Cake in a Blender
Ingredients:
1 large Orange (cut into quarters, and half it again.  Remove seeds and the white plith where possible.  No need to remove the skin - easy right?)
1 cup Sugar
1 cup Oil (I used Canola oil)
3 Eggs
2 cups all-purpose flour
1 tbsp baking powder

Method:

  1. Sift the flour and baking powder together.
  2. Using a blender, blend the orange, sugar, oil and eggs until smooth.
  3. Add the blended mixture to the flour, and mix them well together.
  4. Pour the mixture into greased pan.
  5. Bake in a preheated oven, 150 deg C for 40 minutes.


The cake has a very light orangey fragrance and is a perfect quick afternoon tea-cake.  It's absolutely beautiful with tea. :)

Absolutely yummy and did I mention how easy it is to bake? ;)


ETA:
I just melted some choc and poured over this cake... and the effect is oh WOW!  The choc just adds a whole different dimension to the fragrance of the orange cake... mmmm perfect!

ETA (14 June 2012):
I've tried another recipe of this cake, and it yielded a very good texture too.  It uses butter instead of oil, and self-raising flour instead of the plain flour+baking powder.  I used this recipe to help a friend bake a cake for her 12-month old daughter, so that the Birthday girl could cut and eat the cake with her family for her 1st Birthday. :)


Ingredients:
1 orange, chopped roughly into small pieces (cut into quarters, and half it again.  Remove seeds and the white plith where possible.  No need to remove the skin.)
1 1/2 cups self-raising flour
1 cup sugar
3 eggs
180g butter, melted
Icing sugar for dusting
**If baking for older kids, add about a teaspoon or two of Cointreau for a brighter fragrance)

Method:


  1. Preheat the oven to 180°C. Line a round cake tin with baking paper and set aside.
  2. Place the orange into the blender and blend until it's mushy.
  3. Add the flour, sugar, eggs and butter and blend until just combined.
  4. Pour into the baking tin and smooth surface. Bake for 40-45 minutes or until a skewer pushed into the centre comes out clean.
Made in a 9-inch springform pan.

Frosted with Orange Icing.  Basically,  250g icing sugar mixed with 50ml orange juice.  We covered the cake, and then when the icing dried, it had a very nice glossy finish.


Because the recipe was so simple, I tried it out making cupcakes!  I frosted with melted chocolates...

...and the left over orange icing!  I added the Cointreau for these cuppies and my kids really loved it!

The texture is so fine and fluffy.  I didn't store them in the fridge, just in an air-tight container on the kitchen counter.

For a larger cake, you might consider using a simple choc ganache, but jazzing it up with Cointreau:

Ingredients:
170g Dark Chocolate (I used the Cadbury Old Gold 70% Cocoa)
1 teaspoon Cointreau
1 can Nestle Cream Pure Dairy Sterlised Cream

Method:
1. Heat the choc in a microwave oven at short bursts of 20 sec at med heat until all the choc is melted. Be careful not to burn the choc.
2. Pour the can of cream into the melted choc and mix well until the two ingredients are incorporated.
3. Add in the Cointreau and blend well.

Done!

The choc ganache is pliable and holds itself well in our warm weather. Excess ganache can be stored in the fridge and warmed in the microwave before use.


Friday, 18 March 2011

Dinosaur Cakepops

A mini-dino conference!


This is so easy to do! My dinosaur-loving nephew had a party and I made these for him.

Just fashion the cake into a dinosaur shape with a big head and a long tail. Use a skewer to shape arms and legs. Dip the shape into chocolate coating and attach white sprinkles for the eyes. Dot the sprinkle with an edible ink pen.

While the chocolate is still soft, attach jumbo heart sprinkles all the way down the back of the dino. If the choc is already hardened, then dip the heart into a little of the melted choc and attach it to the dino.

I made only 4 Dino cakepops for him, and he was so nice to share it with his cousins. =)


Headless dino!

Tuesday, 26 October 2010

The Cheater's Calzone or In-A-Pinch Pastie


A calzone is a pizza that has been folded over with all the toppings inside. A pastie is an English version of a calzone, with the same principle of a meat filling inside a semi-circle - a portable pie. In Singapore, this is sort of like our curry puff, but not with curry filling, of course.

A good friend posted the method of using frozen pratas in her Facebook to make these delicious versions of the calzone or pasties. The fillings is really up to your imagination and whatever you have in the kitchen.

The Cheater's Calzone or In-A-Pinch Pastie
INGREDIENTS
8 Frozen Prata
1 can Luncheon meat
1 Onion chopped
2 tsp Minced Garlic
Dried Basil (I used fresh Basil as I had leftovers, but dried is fine)
Dried Oregano
Black Pepper
Sliced Cheese

METHOD
  1. Combine the luncheon meat, onion, garlic, basil, oregano and pepper.
  2. Put the mashed mix on one side of the frozen prata.
  3. Put half a slice of cheese over the mix.
  4. Fold over the prata.
  5. Crimp the open sides of the prata with a fork to seal the prata up.
  6. Arrange the filled prata on a lined baking sheet.
  7. Pop it into the oven at 180 deg C for 20 minutes or until you see the prata nicely browned.
  8. Serve as is, or with veggies and baked beans.


I made another filling a few days later, this time with corned beef instead of luncheon meat. As you can see from the picture below, I also added avocado slices to the cheese, onion and garlic.


You can also try using tuna, sardines, curry or chicken pie fillings - the sky's the limit for these delicious and simple to make pasties! =)

Tuesday, 10 August 2010

Banana Chocolate Chip Muffin with Crumble Crust


It's been some time since I last posted a baking entry, and this one is not only simple to make, but simply delicious.

Hubby had stuffed a bunch of 6 Del Monte bananas in my bag after Day 1 of Ethan's fencing tournament, and when we got back home, imagine our shock horror surprise when the bananas looked so bruised and battered! ;P

What to do? What to do? I had made Jemput Jemput Pisang just a few days prior, and I didn't want to make something fried for Ethan's fencing tournament the next day. Therefore, I decided to make banana muffins for him to eat in-between bouts to boost his energy. Banana muffins were ideal and what better energy boost than adding chocolate chips to the mix? ;P


Ingredients

1 1/2 cups all-purpose flour
1 teaspoon baking soda
1 teaspoon baking powder
1/2 teaspoon salt
6 bananas, mashed
3/4 cup white sugar
1 egg, lightly beaten
1/3 cup canola oil
1/2 cup chocolate chips
1/3 cup packed brown sugar
2 tablespoons all-purpose flour
1/8 teaspoon ground cinnamon
1 tablespoon butter

Directions
  1. Preheat oven to 190 degrees C. Line a muffin/cupcake tray with 12 muffin papers.
  2. In a large bowl, mix together 1 1/2 cups flour, baking soda, baking powder and salt. In another bowl, beat together bananas, sugar, egg and canola oil. Stir the banana mixture, chocolate chips into the flour mixture just until moistened - don't over-stir, otherwise the muffin might be hard. Spoon batter equally into prepared muffin cups.
  3. In another small bowl, mix together brown sugar, 2 tablespoons flour and cinnamon. Cut/crumble in 1 tablespoon of solid butter until the mixture resembles coarse crumbs. Sprinkle topping equally over muffins.
  4. Bake in preheated oven for 18 to 20 minutes, until a toothpick inserted into center of a muffin comes out clean.
  5. Enjoy!


I'd love to claim that my muffins helped Ethan do well in his tournament - he was placed joint-3rd - but I know that the hardwork belonged to him alone. =)