Showing posts with label frosting. Show all posts

Thursday, 17 May 2012

Junior Cake Chefs!


The week after the Cookie Decorating class for No.3, I held a Cake Decorating class for No.2's class.

Their cooking brief was simple: to decorate a cake given to them into one of the 4 transports they've learnt as part of their module on Transportation.

I first got the kids to discuss and plan on paper how best to cut their cake into a 3D version of the transport (Car, Plane, Ship or Train), and how they would decorate it.

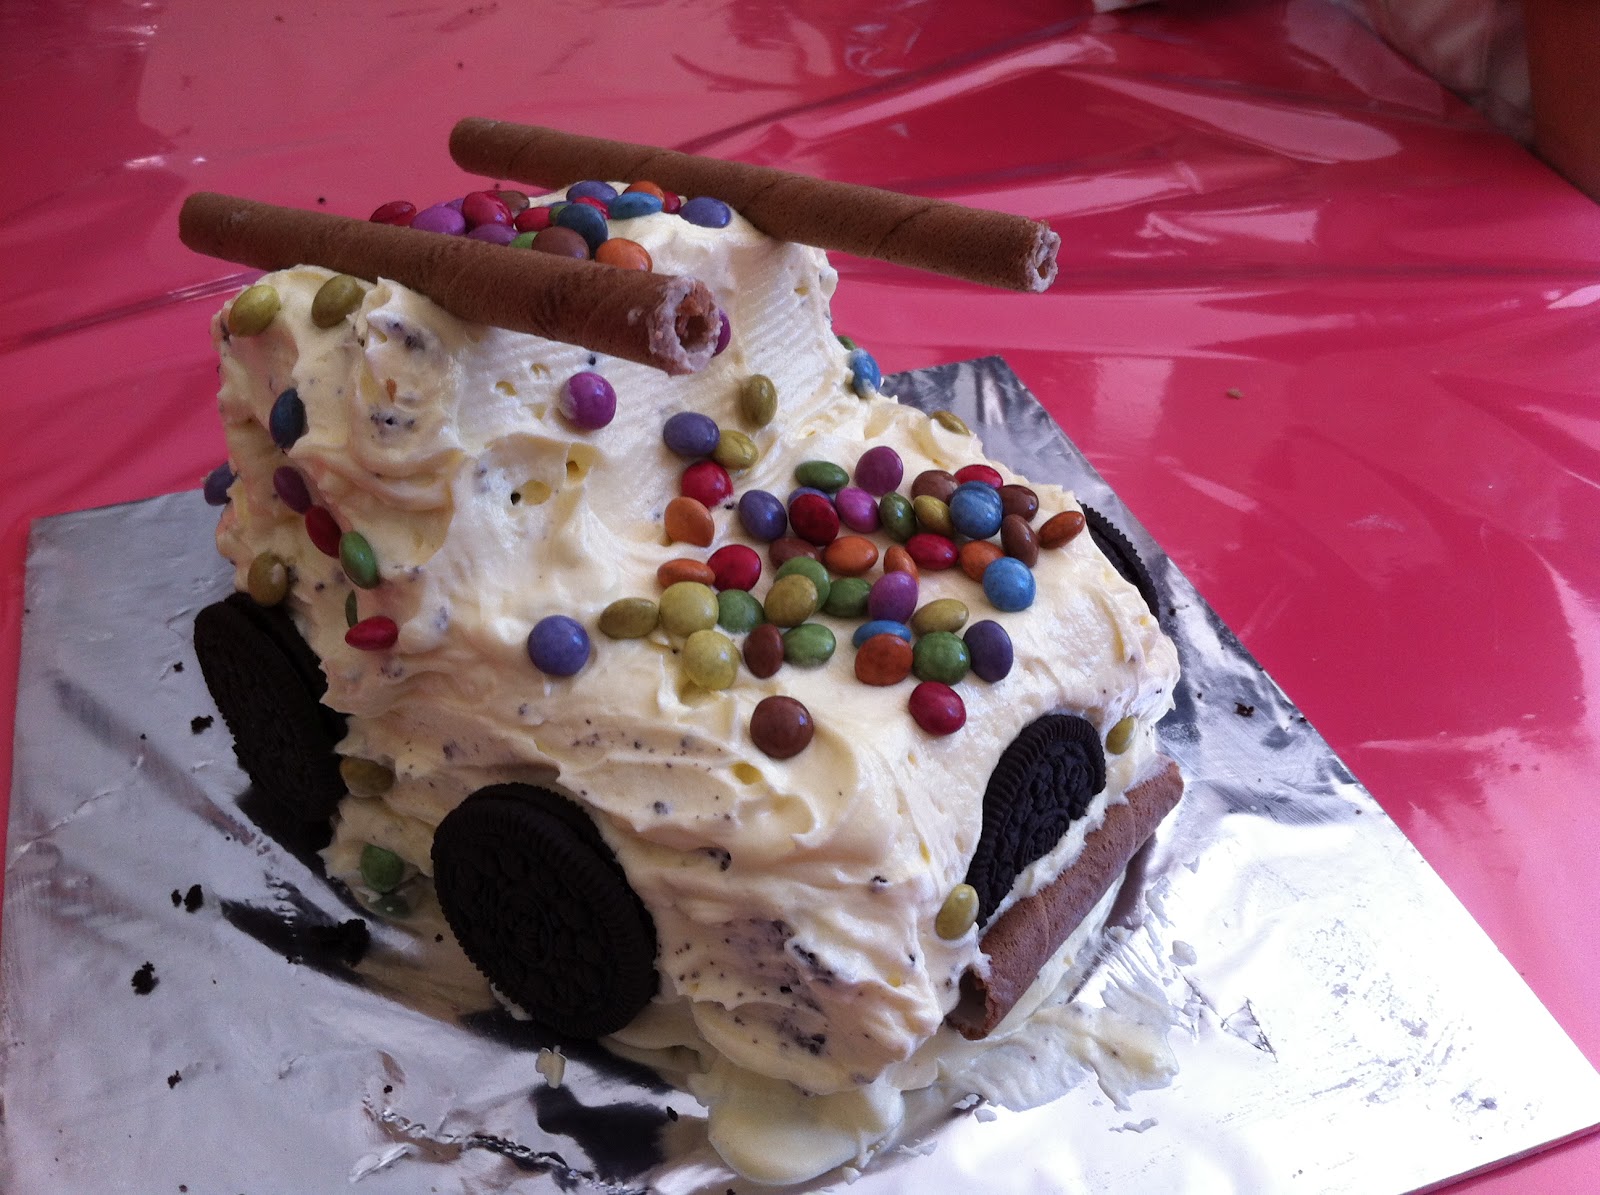
Next, I showed them the resources they will be given for decorating the cake: buttercream frosting, Smarties, Rolled Biscuits, and Oreos.

Then the kids got down to decorating their cakes... and eating it too! ;)

Here are the highlights:
The cakes in the box, the ziploc packets of buttercream frosting, Oreos, Smarties and Rolled biscuits.  All the kids are given are cake board and a butter knife, and are taught knife safety. :)
How many of you like chocolate cakes?
Great plan.  Now how should we cut the rectangle cake to get the design we want?
So the next step is?
Plan done.  Now to get the decorative bits!

Cutting the cake to assemble. 
It's beginning to take shape.
What does this look like? ;) 
More frosting, please!
Messy fun!
See our sticky hands?
Morning class' CAR.
Morning class' SHIP.
Morning class' PLANE.
Morning class' TRAIN.
Yummy!
Afternoon class' turn at decorating.
Afternoon class' CAR.
Afternoon class' SHIP.
Afternoon class' PLANE.
Afternoon class' TRAIN.

Say 'Cakes!'
Yum!
Yay!


The recipe for the chocolate cake can be found here, which is my favourite go-to chocolate cake recipe.  I just baked in an 8x8-inch square cake tin, and cut it into 2; half for each of the group.  Because that was a busy week for me in terms of work, I wrapped the cake in baking parchment, and then in plastic wrap and froze all 4 cakes, defrosting them in the fridge the night before the session.

The buttercream frosting I used was a simple one, but with the Kitchenaid beating it, the texture was really, really good.


Buttercream Frosting
Ingredients:
1 block unsalted butter, softened
1 teaspoon vanilla extract
2.5 cups confectioners' sugar
2 tablespoons milk


Directions:

  1. In a mixer, cream the butter and vanilla.
  2. Add in the sugar, one cup at a time, beating well after each addition.
  3. Beat in the milk, and continue mixing until light and fluffy. 
  4. Keep frosting covered until ready to decorate.

I just scooped the frosting into ziploc bags and put it in the fridge.  Because of our tropical weather, the frosting gets pliable quite easily, but it holds relatively well nonetheless.  When the kids need the frosting, I just cut a corner of the bag and the kids can pipe it onto the cake and use the butter knife to spread the buttercream.

Friday, 20 April 2012

Butter Cookies and a Sugar Icing Class

No. 3 couldn't resist dipping into the icing for a lickity lick! :)
No. 2 and 3's school has asked me to give a cookery class for the kids of their level.  After discussions with the form teachers, I've decided that since No. 2's class was on the topic of Transportation and No. 3 on the topic of Shapes, to create a cookery class based on those themes.

No. 3's lesson was this morning.  I've decided that instead of having them use cookie cutters to cut out shapes of triangles, squares and circles, to make it 'easy' and time efficient to get them to ice cookies with shapes instead.

Icing requires the Nursery kids (4-year-olds) to activate their fine motor skills - not that easy a task.  But no matter... it was the sensory experience of taste this cookery class was about, and in which playing with food a key factor! ;)

To this end, I decided that the smaller the child, the bigger the cookie needs to be.  So I made square cookies the size of a slice of bread for each child to use as an edible icing board.

It was not easy at first to look for a rolled cookie recipe that enabled me to cut and bake that size of a rolled dough.  The first recipe I used from Allrecipe was too sticky and melted very fast in our hot weather.  Furthermore, it was almost impossible to cut and move out a large square cookie shape.  In the end, I found a butter cookie recipe that worked well.  However, I had issues with transferring the cut-cookie to the baking tray, until I hit upon an idea which I've made a photo-tutorial after the Butter Cookie Recipe:

Butter Cookie Recipe

Ingredients:
(For about 11 bread-slice-size squares... I'd suggest halving this recipe if you're making it for home.)
450g Plain Flour
2 tsp Baking Powder
200g Butter
210g Sugar
2 eggs
2 tsp Vanilla Extract

Methods:

  1. Sift flour and baking powder. Set aside.
  2. Cream butter and sugar until butter lightens.
  3. Add eggs one at a time. Add vanilla extract.
  4. Add flour and beat on very very low speed for 10 seconds. You only want the flour to gather and form a dough - not create gluten. The lighter the forming, the better the texture of the cookie. At this point, I put the dough in a plastic wrap and put it in the fridge to harden a bit before rolling out.
  5. Bake 180deg C for 10 minutes, then turn tray to even out the baking for another 4 minutes. Cool on rack.


Cutting the Bread-Slice-Sized Cookie:

Cut the silicon-coated baking sheet to a size slightly larger than the cut-cookie size.  Sprinkle icing sugar on it to help prevent it from sticking.

Put some cookie dough on top of that, and sprinkle more icing sugar on top.

Place another sheet of the baking paper over that to roll out.

Using a rolling pin with a height guide (this one is about 0.5cm) helps tremendously!

I used an air-tight container that's square-shaped to cut the cookies.  Dip the edge into the icing sugar to help prevent the dough from sticking to it.

Make sure that the rolled dough is larger than the square box.

Remove the excess dough.

Ta-da!  What the dough looks like after removing the box.

Then put the entire cut-cookie dough on the baking tray.  This way, you don't have to handle the cookie by tranferring onto the tray.

When the tray is filled, use cookie cutters to press in shapes so that the kids can ice, following the lines.  Or just leave it blank for the kids to use their imagination in icing.  I didn't have square or triangle cutters, so I used a butter knife to form the shapes. :)  You can also use a toothpick to draw lines or pictures etc.  This helps later in icing.

These are done baking.

A close up.

The lesson today was really simple and fun.  I taught the kids how to make icing.  Of course, the icing were pre-made and coloured and put into tiny ziploc bags that I bought from Daiso (70 pieces for S$2!).  When the kids need to ice, I just cut a tiny hole at the corner of the bag, and the kids are good to go.

Icing Sugar Recipe
Ingredients:

(This is sufficient to make 4 packets of colour.  I used double this recipe to make 8 packets of the same colour because there are 8 groups to prepare for - 4 each for AM and PM class.)
120g confectioners' sugar/icing sugar
20g milk
24g light corn syrup
Food colouring gel

Directions

  1. Put all the ingredients except the food colouring gel in a small bowl, and stir together until it comes together.  If needed, thin the mix with the addition of milk, half a teaspoon at a time.  If you're going to use liquid colouring, add this to the ingredients before you start thining the icing with milk.  You may also add flavouring extract if you want - almond or rose, or lemon would be good.  If you're going to add extract, again, hold off thining with milk until you used the extract first.
  2. Separate the mix into different bowls to add the gel colouring of choice.
  3. Spoon the icing into tiny ziploc bags and cut the edge to enable piping.  Otherwise you may add a little more milk to the icing to make it a thick paint - use a paintbrush to help paint on a design to your cookie.


The icing in the rectangle packs - Red, Yellow, Green, Blue and Purple.  The lesson was making Orange... mixing a dot of red gel and yellow gel. :)

The kids tracing the shapes with the icing... of course with adult help! Then after they got the shape, it was really up to them how they wanted to decorate their cookie.

I love how their tiny hands measured up to the cookie. :)  I helped this girl play with the idea of the square as a window. :)

Tune in next week for No. 2's class - cake decoration! :)

Saturday, 1 October 2011

Ice... Cream Cake?

It being Children's Day, it would be the perfect time for cupcakes and ice-cream... only in this heat, how could an ice-cream retain its shape?  Ah-ha!  The perfect solution then: an "Ice" Cream Cupcake! ;)


This is really an easy and fun project for the kids to do too.  I started out with a flat bottom ice-cream cone wafer.  Flat bottom, because I wanted to end up with a cake that looked like McDonald's Vanilla Cone, and also because it would be less of a hassle to bake.

I used my favourite chocolate cupcake recipe and poured it into the cups.  I used the muffin tray to help hold the cones evenly separated.  With the recipe, I was able to make 18 cones.


Next, I made a perfect buttercream for this weather: Swiss Meringue Buttercream.

I discovered this recipe while looking for a better buttercream recipe, and this was the result.  Swiss Meringue, because of the way it cooks the egg whites, creates a buttercream that holds well in our hot and humid weather, and yet has a silky, creamy texture - much like a soft, creamy marshmallow. *dreamy sigh*


Instead of posting up the how-to, here's a video of how simple it is to make:


Although the ratio for the eggwhite:sugar:butter is 1:2:3, I actually used 70g egg white (from 2 eggs), 125g sugar and 200g butter.

After the cake was cooled, I covered the top with the cream and then piped the soft-swirl look on the cones...

And ta-da!

Happy Children's Day, young and young-at-heart! =)

ETA (2 March 2012):
I made this again, on my Girl's request that I make it for her Birthday.

Instead of using the SMBC, I just used a plain meringue frosting.  The frosting held up better and was much easier to pipe.  I used about 1:1 amount of eggwhite to sugar, and added vanilla for the white cones and added strawberry emluco for the pink ones. :)

The Meringue frosting kept better and was better received by the kids.  It tasted like marshmallow. ;)
I used these baskets, and sewed fishing lines across to hold the cones apart.  It also stabilised the cones so that I could carry it to school.
I used another basket to cover the bottom basket, and taped the sides to secure.  The blue baskets were later used to elevate the cones for display.

Happy 6th Birthday, Beautiful Girl! :)
I used 6 'Happy Birthday' tags to jazz up the cakes.  With cones, displaying them is a bit difficult.  I had a '6' candle that's at the table, which you can't see in this pic.  The pink and purple cloth are recycled from last year's display, and they are hiding the blue baskets. ;)