Friday, 20 April 2012

Butter Cookies and a Sugar Icing Class

No. 3 couldn't resist dipping into the icing for a lickity lick! :)
No. 2 and 3's school has asked me to give a cookery class for the kids of their level.  After discussions with the form teachers, I've decided that since No. 2's class was on the topic of Transportation and No. 3 on the topic of Shapes, to create a cookery class based on those themes.

No. 3's lesson was this morning.  I've decided that instead of having them use cookie cutters to cut out shapes of triangles, squares and circles, to make it 'easy' and time efficient to get them to ice cookies with shapes instead.

Icing requires the Nursery kids (4-year-olds) to activate their fine motor skills - not that easy a task.  But no matter... it was the sensory experience of taste this cookery class was about, and in which playing with food a key factor! ;)

To this end, I decided that the smaller the child, the bigger the cookie needs to be.  So I made square cookies the size of a slice of bread for each child to use as an edible icing board.

It was not easy at first to look for a rolled cookie recipe that enabled me to cut and bake that size of a rolled dough.  The first recipe I used from Allrecipe was too sticky and melted very fast in our hot weather.  Furthermore, it was almost impossible to cut and move out a large square cookie shape.  In the end, I found a butter cookie recipe that worked well.  However, I had issues with transferring the cut-cookie to the baking tray, until I hit upon an idea which I've made a photo-tutorial after the Butter Cookie Recipe:

Butter Cookie Recipe

Ingredients:
(For about 11 bread-slice-size squares... I'd suggest halving this recipe if you're making it for home.)
450g Plain Flour
2 tsp Baking Powder
200g Butter
210g Sugar
2 eggs
2 tsp Vanilla Extract

Methods:

  1. Sift flour and baking powder. Set aside.
  2. Cream butter and sugar until butter lightens.
  3. Add eggs one at a time. Add vanilla extract.
  4. Add flour and beat on very very low speed for 10 seconds. You only want the flour to gather and form a dough - not create gluten. The lighter the forming, the better the texture of the cookie. At this point, I put the dough in a plastic wrap and put it in the fridge to harden a bit before rolling out.
  5. Bake 180deg C for 10 minutes, then turn tray to even out the baking for another 4 minutes. Cool on rack.


Cutting the Bread-Slice-Sized Cookie:

Cut the silicon-coated baking sheet to a size slightly larger than the cut-cookie size.  Sprinkle icing sugar on it to help prevent it from sticking.

Put some cookie dough on top of that, and sprinkle more icing sugar on top.

Place another sheet of the baking paper over that to roll out.

Using a rolling pin with a height guide (this one is about 0.5cm) helps tremendously!

I used an air-tight container that's square-shaped to cut the cookies.  Dip the edge into the icing sugar to help prevent the dough from sticking to it.

Make sure that the rolled dough is larger than the square box.

Remove the excess dough.

Ta-da!  What the dough looks like after removing the box.

Then put the entire cut-cookie dough on the baking tray.  This way, you don't have to handle the cookie by tranferring onto the tray.

When the tray is filled, use cookie cutters to press in shapes so that the kids can ice, following the lines.  Or just leave it blank for the kids to use their imagination in icing.  I didn't have square or triangle cutters, so I used a butter knife to form the shapes. :)  You can also use a toothpick to draw lines or pictures etc.  This helps later in icing.

These are done baking.

A close up.

The lesson today was really simple and fun.  I taught the kids how to make icing.  Of course, the icing were pre-made and coloured and put into tiny ziploc bags that I bought from Daiso (70 pieces for S$2!).  When the kids need to ice, I just cut a tiny hole at the corner of the bag, and the kids are good to go.

Icing Sugar Recipe
Ingredients:

(This is sufficient to make 4 packets of colour.  I used double this recipe to make 8 packets of the same colour because there are 8 groups to prepare for - 4 each for AM and PM class.)
120g confectioners' sugar/icing sugar
20g milk
24g light corn syrup
Food colouring gel

Directions

  1. Put all the ingredients except the food colouring gel in a small bowl, and stir together until it comes together.  If needed, thin the mix with the addition of milk, half a teaspoon at a time.  If you're going to use liquid colouring, add this to the ingredients before you start thining the icing with milk.  You may also add flavouring extract if you want - almond or rose, or lemon would be good.  If you're going to add extract, again, hold off thining with milk until you used the extract first.
  2. Separate the mix into different bowls to add the gel colouring of choice.
  3. Spoon the icing into tiny ziploc bags and cut the edge to enable piping.  Otherwise you may add a little more milk to the icing to make it a thick paint - use a paintbrush to help paint on a design to your cookie.


The icing in the rectangle packs - Red, Yellow, Green, Blue and Purple.  The lesson was making Orange... mixing a dot of red gel and yellow gel. :)

The kids tracing the shapes with the icing... of course with adult help! Then after they got the shape, it was really up to them how they wanted to decorate their cookie.

I love how their tiny hands measured up to the cookie. :)  I helped this girl play with the idea of the square as a window. :)

Tune in next week for No. 2's class - cake decoration! :)

Sunday, 12 February 2012

Brenda's Cream of Chicken Soup


Best. Soup. EVAH!!!

This is the first time I made Cream of Chicken soup, but because I had my family over, I made a huge pot because I know how much my family enjoy soup.  But amazingly, every drop of it was gone... even the bowls I set aside for my cousin to ta-bao, and the serving that was meant for my nephew (who wasn't able to make it for dinner) were given over to the second and third helping requests.

And yes, my daughter even said, "So yummy! Can you made this soup again?"

So to safe-keep the memory of how to make this soup, I'm putting up the recipe here. ;)

Ingredients:
2 Boneless Chicken Legs with Skin
2 tbsp Butter (I use butter for the flavour, but you can use olive oil too)
2 medium-sized Onions, chopped
3 stalks of Celery, sliced thinly
2 Russett Burbank Potatoes, diced
1 Carrot, cut into strips
1.5L Chicken Stock
1L Water
Dried herbs: Dried Oregano, Dried Basil, Crushed Black Pepper
Salt to taste
1 tbsp Flour
1 can, Nestle Cream

Method:

  1. Fry the Chicken Leg skin-side down in the Happy Call Pan, on low-medium heat for 3 minutes, to allow the chicken fat to come out.  Keep the pan closed.
  2. At the end of 3 minutes, open the HCP to see if the skin is cooked golden.  If it is, then use a tong to turn the chicken to cook the other side for 2 minutes.  Keep the pan closed because to enable the chicken to cook without drying out.  Once this is done, set the cooked chicken aside and DO NOT throw away the chicken oil. (If you don't have a HCP, you can fry the chicken in a normal pan, but make sure your pan is covered to prevent oil splatter.  The alternative would be to bake the chicken first, but with the skin side up... but same principle, don't throw away the drippings because that's where the chicken taste is.  It might be more work to use a large oven for only 2 chicken legs; or having to clean up a toaster oven for cooking the chicken legs one at a time, which is why the HCP is more efficient for this recipe. ;) )
  3. Whilst the chicken is cooking, put the butter in a pressure cooker pot, and sweat the onions on low heat.  When the onions have turned translucent, throw in the potatoes and celery and stir it in.  When the potatoes are coated in oil, add in the carrots, chicken stock, most of the water AND the two fried chicken legs.  Add in the dried herbs and a bit of salt. (Not too much salt because we would still need to adjust the salt at the end of the soup.)
  4. Close the pressure cooker and cook for 15 minutes. (Initially, I would have used the thermal pot and cooked this much earlier - at least 2 hours for the veggies to get soft.  However, my mother-in-law gifted me with an 8L pressure cooker, so I decided to try it out instead. ;)  If you don't have either the thermal pot or a pressure cooker, you can also stove-top-cook the soup until the celery and potatoes are softened - about an hour.  But do remember that in stove-top-cooking, water evaporates much more, so you may have to add more water to account for the water loss.)
  5. While the pressure cooker is cooking the soup, add the flour into the HCP at medium to low heat, to mix with the chicken oils to form a roux.  Essentially, fry the flour evenly until you see the flour bubbling, and it gives a biscuit-like scent.  Then lower the heat and add in the rest of the water a little at a time, until you get a brown sauce gravy.  It is this flavourful gravy that will thicken the soup.
  6. When the soup is done, remove the 2 chicken legs and allow it to cool before shedding the chicken meat and put it aside. (You don't need the skin any more... although my kids fight to get the skin because it's just so yummy and chewy...lol!)
  7. Add the gravy into the pot and stir until the soup thickens a bit.
  8. At this moment, the soup is still very chunky, so remove about half to 3/4 of the soup and blend it in a blender.
  9. Add about a ladle of the soup to the cream and stir it to mix well.  Once all the cream has been mixed into the soup, pour the mix into the pot.
  10. Finally, add the shredded chicken meat to the soup and warm it up to allow the soup to thicken and mix its flavours.  At this point, add salt to taste, and you're done! :)
Serve it with warm toasted bread.  Or just slurp it all up on its own.  I'm sooooo going to make this again and again, because it's really worth every step. :)

"So yummy! Can you made this soup again?"

Monday, 6 February 2012

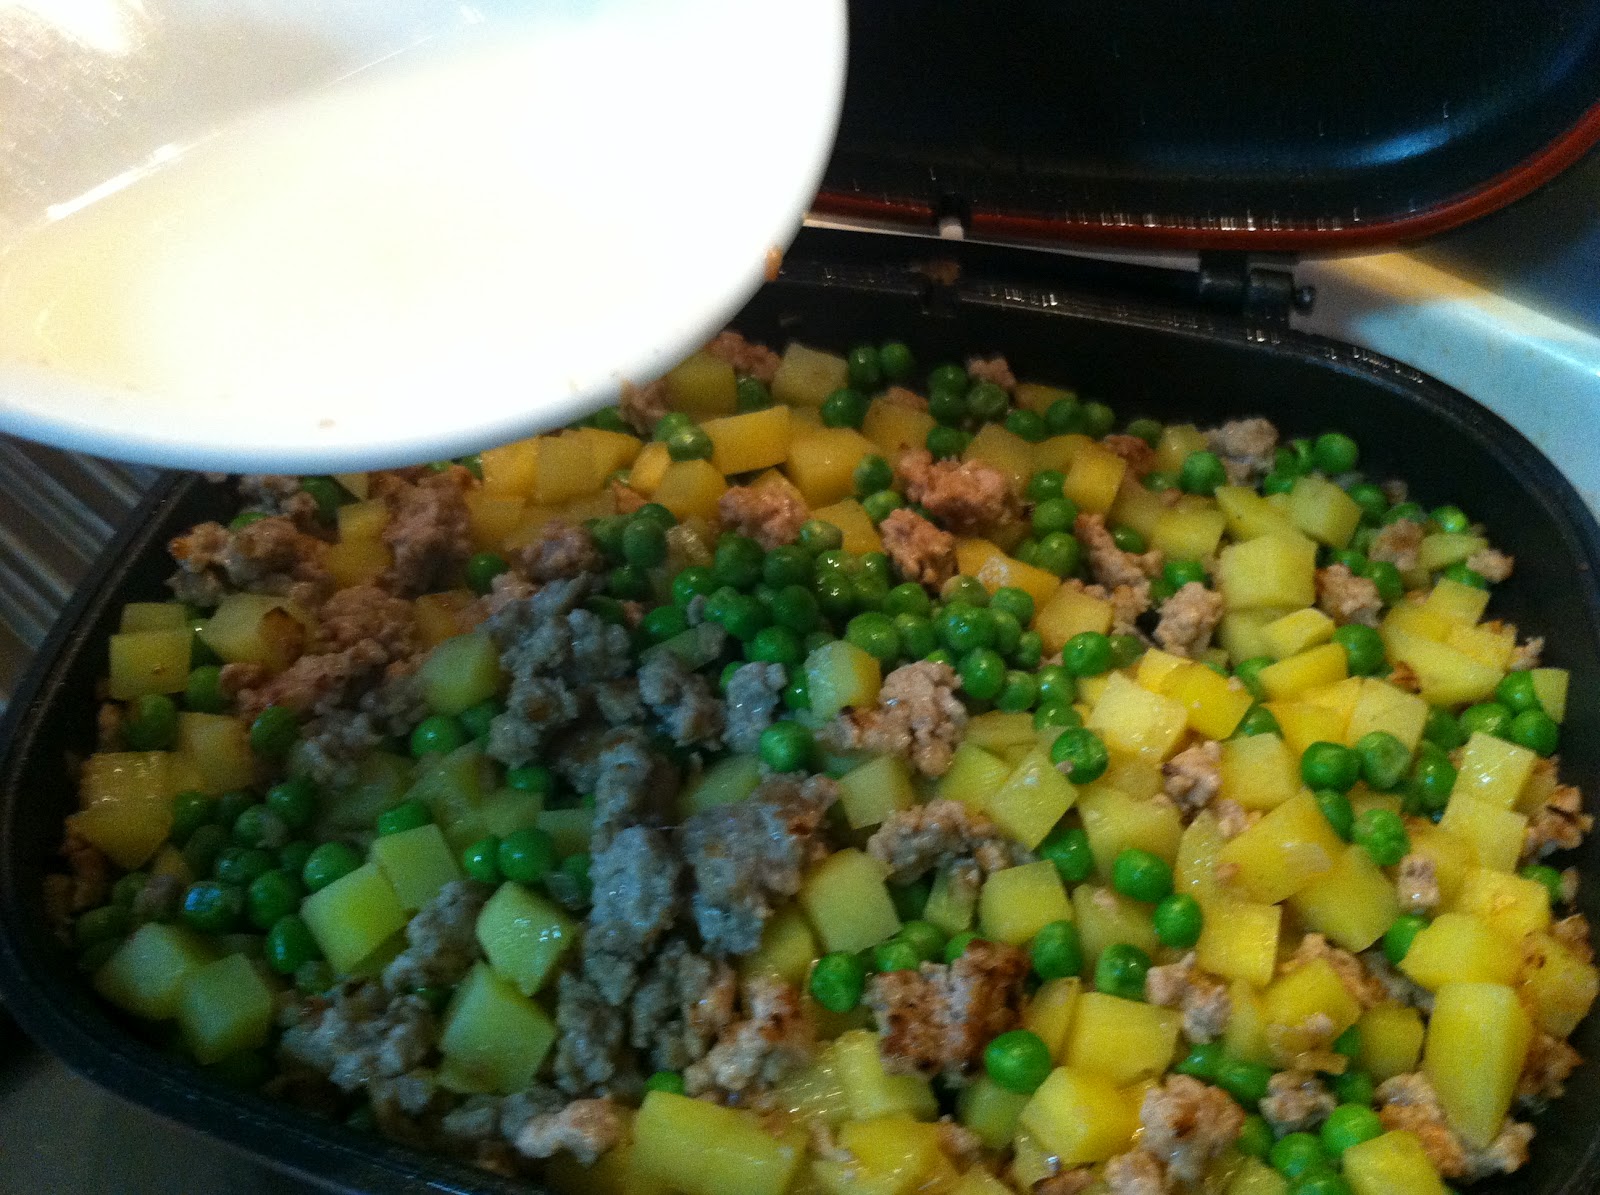
Happy Call Pan Diced Potatoes and Peas with Minced Pork


A simple dish to be eaten with rice, this dish is so easy to do with the HCP!

Ingredients:

2 potatoes, diced
100g minced pork, marinated with light soya sauce, cornflour, pepper, and sesame oil (about 1 tsp each, or to taste)
1/2 an onion, chopped
Frozen green peas
1 tbl cornflour + 1/4 cup cool water
Pepper and Salt to taste

Method:
1. Into the pan goes the potato with a bit of oil. Then lower the heat to have it bake/cook until half done.

2. Once the potato is done, remove it from the pan and fry the onion. I closed the pan to sweat the onions a bit before stirring it around.

3. And then, the minced pork which has been marinated with light soya sauce, some cornflour, pepper and sesame oil goes in to be fried. I added a bit of cooking oil to break up the minced pork.

4. Once the meat is in this stage, in goes the potato and peas to be cooked until the potatoes are done. Do add in a little water to create a steamy environment for the ingredients to incorporate. Also, add in pepper and salt to taste.

5. Once the potatoes are soft enough, add in a mix of cornflour and water, and stir it up to thicken the dish.

Done! :)


6. Serve with rice.

Sunday, 5 February 2012

Happy Call Pan No-oil Chicken Chop with Enoki Mushroom Sauce

I'm not starting with the first foods I've cooked, but with the one I did yesterday. ;)

And there's only one pic of the result and here it is:

The principles of using the HCP is very simple - low heat, timing and evapouration.

Because of the pan's construction, heat is distributed very quickly, so at medium heat, food can char very easily beyond 3 minutes.

Therefore, the best friend of the HCP isn't the silicon cooking utensils to prevent scratching on the non-stick ceramic surface (although that's a close second ;P), it's the timer on my iPhone! :)

The final priniciple is to remember that the HCP has a seal.  This means that most of the water that's evaporated from the ingredients are trapped in the pan, creating a steam-like environment, which is great for veggies, but not so much when you want crispy meats or fish.

So, how then do we achieve perfect Chicken Chop that tastes tender and moist, and yet has a crispy exterior?

It's simple with a HCP.

No-oil Chicken Chop
Ingredients:
Boneless Chicken meat with skin
Salt & Pepper to taste

(Yes, that's all.  No marinates needed. ;P)

Method:

  1. Use a kitchen hammer and hammer the chicken chop.  The purpose of this is to tenderise the meat, and to get it uniformly flat.  If you skip this step, the chicken meat may not sit well on the pan, and some parts of the surface may be crispier than others. ;)  I usually use boneless Chicken legs which I buy frozen in 2kg packs from NTUC.
  2. Salt and pepper your chicken after hammering.
  3. Turn on the fire to medium heat and place the chicken skin side down on the pan and close the lid. (There's space for 2 to 3 large chicken pieces, so to save fuel, just put in as many as would fit)  Set the timer for 2 minutes.  Refrain from the urge to open the pan and lose all that lovely steam, which will cook the chicken into tender moistness. ;)
  4. Open the pan to check the progress of the chicken at the end of 2 minutes.  My medium heat and your medium heat are different.  For me, I'll need another minute to get the skin a little more golden.  If your medium heat is a bit higher than mine, and you've already achieve some golden crispiness and chicken oil seeping out, you're done with this step.  If yours need more cooking, set your timer at 1 minute intervals to check until you get a light golden skin.
  5. At this stage, use a silicon-coated tong to turn the chicken pieces, so that the skin side is up.  I know some people would prefer to flip the entire pan, but I don't like to do so.  I find it messes up the position of my chicken and I lose all that lovely heat that's evenly distributed on the bottom pan. ;) Set your timer to 3 minutes and lower the heat.  Don't fully close the lid though - put something thick between the magnetised handle to all the lid to cover, but not seal the lid.  We want the steam to evaporate and retain all that crispy skin.  I use the handle of my stove lighter to wedge the handle, but you can use a wad of thick cloth, or find a bottle or something to wedge the handle.  By now, you'll note that the bottom of the pan has oil that came from the chicken... all those lovely chicken fats are full of flavour, and it's the best oil to fry the meat side of the chicken. :)
  6. At the end of the 3 minutes, open the lid and check the progress of the skin side.  Determine if you need more time for a golden finish (it ought to be darker than the skin side), or if it's just nice.  If it's ok, you'll just need to flip the chicken one more time, for one more minute at this heat for the skin to really crisp up.  Remember to have the lid partially open with the wedge so that the steam can evaporate.
  7. Remove the chicken from the pan and then put it in an aluminium foil and keep it covered for about 5 minutes (or until all the chicken chops that you're cooking are done).  This final step, also known as 'rest', helps the chicken juices to redistribute through the meat so that the meat is moist.  Don't cut the chicken before it has rested - otherwise all the moisture will be lost, and you end up with dry, gummy chicken!
  8. If you're cooking more chicken, pour the residual chicken oil on the pan into a glass/porcelain bowl and wipe the pan down with a kitchen paper before beginning the process again.  I usually use a tong holding the kitchen paper to scrape down the debris and throw the paper away.  Save that chicken oil for making the sauce!
  9. When the 'rest' is done, you'll find that there is a lot of fragrant chicken juice left at the bottom of the aluminium foil.  Add this juice to the chicken oil to make the sauce.
This method of cooking chicken skin-side down first, is also the way I cook my Salmon fillets.  The heat renders the fats and I don't need to add extra oils to cook my meats on the non-stick surface.  With the fragrant fats, I find I don't need to use too much condiments to add taste to the food. ;)


Simple Brown Sauce
And it's really simple.  Brown sauce is made from thickening the fats that have dripped from cooking meats.  If baked in the oven, the fats and juices are retained and cooked with flour, and water is added to form a gravy.  It is then seasoned to taste.  In a HCP, this is very easily done.

Ingredients:
Flour, about 1 tablespoon
Hot water, about half a cup
Salt and Pepper to taste (Salt can also be replaced with light soya sauce or a mix of the two is also fine)

Method:
  1. After frying the chicken and while the chicken is resting, there's no need to pour away the oils or wipe down the pan.  Just pour whatever oils and chicken juice that's available into the hot pan and add in about a tablespoon of plain flour to the pan.  Once most of the flour is absorbed, heat the pan to low heat and stir the mix until it's brown - it takes about 1 minute.
  2. Add in water to the pan and close the lid for 1 minute.  When you open the lid, stir to blend the mix so that it looks like gravy.  Add more water if you need to thin it, or allow the pan to evapourate the water if it looks too watery.
  3. Add in the salt and pepper to the taste you want.

The brown sauce is versatile in that you can add other flavourings to get different kinds of sauces.  For a wine sauce, replace the water with red wine.  Others have added A1 sauce for a more sourish-sweet sauce, or honey for a sweetish finish.  Play and experiement to your preference; try adding fresh herbs etc, and then strain the gravy through a sieve for a smooth finish if necessary.


Enoki Mushroom Sauce
For my Enoki Mushroom Sauce, all I did was to add 2 packets of Enoki Mushroom into the Brown Sauce and close the lid for 1 minute (I cooked 5 chicken legs for dinner).  After that, I adjusted the water, and stirred the mushroom a bit and it was done.  After I did the sauce, there was still more juice from the resting chicken during the time I cooked the sauce, so I added those into the sauce and stirred it in.  Yum!

Because I wanted to retain my chicken's crispy skin, I put the Enoki mushroom on the plate first and then the chicken on top.  Not only it looks better, I won't end up with soggy chicken skin. :)


Enjoy your Happy Healthy Happy Call Pan Meals! :)

Jailbreaking the Happy Call Pan

Image from Gmarket reviewer.
I joined the crowd of happy Happy Call Pan users in October last year, following a spree organised by some good friends who raved about the pan.

Since then, I've been happy to switch most of my wok-cooking to using the HCP.

HCP is a very good kitchen hardware with excellent design.  It's not Teflon-coated, which means that its non-stick ceramic surface isn't likely to create health issues, especially at high temperature.  Its base and lid are designed with a ridged surface, which enables heat to be distributed very quickly to the food, and the silicon seal with a strong magnetised handle allows the pan to act like a pressure cooker/oven to seal the heat in the pan to enable it to cook faster and even bake foods at a lower direct temperature.

HCP users have created a repository of recipes using the HCP at munchministry.com.  There are recipes for baking cakes, cookies, alongside the usual suspects like fried and stewed foods.  Most foods that require oven baking can be adapted to using the HCP - a plus for many households that doesn't own an oven.

For me, the choice of using the HCP and oven really depends on the amount of food I'm cooking, and the fuel that's needed.  I prefer to use electricity with my oven/Airfryer over gas stove because my house isn't fitted with piped gas, and I need to keep calling the gas shop to deliver their gas tanks when mine runs out. However, I've also noted that with the HCP, I'm actually using less gas compared to using the wok.  I've not needed to use the largest burner, which I naturally would need to when using the wok.  The maximum heat I use for the HCP is medium, and even then, not for more than 3 minutes, otherwise the food would burn!  That's how efficient the HCP is!

The HCP is very versatile, but many users complain that the design of the hinged lid is also the flaw - the hinge creates a problem for washing up and for removing foods efficiently from the pan.  Not a problem for me - I've simply removed the c-pin that keeps the hinge together, and my HCP lid can be easily removed from the bottom pan for cooking or washing.  It even makes tilting the food onto a plate so much easier because I don't have to grapple with the weight or bulk of the lid.

Here's how I jailbreak my HCP ;) :
Use a screwdriver to gently pry the c-pin from the hinge. 
Here's how it looks with the c-pin removed.  The hinge still works fine. :)

Now I have 2 pans! ;)  The one with the red edge is the lid.  To use, just hook the lid into the slots on the bottom pan.

A simple slot back.  You'll get the hang of it after a while. :)

With the magnetised handle, even without the c-pin, the lid stays firmly closed and will not move, even if you do need to flip your pan.
This will be my first HCP post.  I'll soon be posting a few recipes I've adapted for the HCP, and a few that I've tried from munchministry. ;)

Happy Happy Call Pan Cooking! :)

Monday, 23 January 2012

Konnyaku Fish

年年有余!

Happy Lunar New Year!

It's the first day of Chinese New Year today, and like all Chinese festive days, it's a day marked with great emphasis on family, well-wishes, traditions and practices.  Naturally, a great festive day cannot go without food - and CNY foods are always given wonderful names of blessings.

In Chinese, one of the food items that cannot be left out of the banquet table is the fish, for 'fish' in Chinese sounds like 'Abundance' (Yu).  The Southern Chinese eat a dish called Yu Sheng, which is raw fish salad, because it sounds like "abundance increase".  A New Year greeting, "年年有余" (nian nian you yu) means "Every year, there's abundance", but at the same time, it sounds like "Every year, there's fish".

Today's dessert is wonderfully simple to make - 15 mins tops, plus an hour to set - and is a perfect end to any CNY feast. ;)  I first had it when my brother's girlfriend served it at our family Reunion Dinner.  Since then, I've made 3 batches of this for CNY dinners. ;)  You can also make this to serve your guests when they come a-visiting. :)

Ingredients:
1 sachet/packet, plain Konnyaku Powder - gather the ingredients following the instructions on the packet for making the required amount of jelly for the mould you have
2 to 3 tsp* Sweet Osmanthus Flower aka 桂花 (Gui Hua) - easily obtained from any Chinese Medicine shop
1 to 2 tbsp* Wolfberry aka Goji berry aka 枸杞 - also easily obtained from any Chinese Medicine shop
Fish Jelly Mould

*depends on the amount of water in the Konnyaku Powder indicated on the packet.  Generally, about 1 teaspoon of Osmanthus flower for about 180-250ml of water.  If you'd like less speckled fishes, add less.  As for wolfberries, I estimate based on number of fish moulds I have... see Method step 4. ;)

Method:

  1. Steep the Osmanthus Flower and Wolfberry into the required amount of hot water for about a minute and then strain the flowers and berries out.  The water is then used to boil in a saucepan for making the Konnyaku jelly.  Do not throw the flowers and berries out though - you'll need them for the jelly later.
  2. Prepare the jelly according to the packet's instruction.  In place of water, you'll have to use the water you strained from the flowers and berries.  Follow the amount of sugar instructed by your jelly packet.
  3. When jelly is almost ready, put the flowers and berries back into the saucepan and give it a stir to mix it all in.
  4. Ladle out the berries and flowers into the fish mould.  I'll count out the berries in each mould to be  2 (if the mould is very small) because 2 is an even number and the Chinese believe that 'good things come in pairs'... also because it sounds like 'easy'; 6 because 6 sounds like 'prosperity'; 8 because 8 sounds like 'to prosper'; or 10 because 10 connotes completion to the Chinese.  I'll be careful to have even numbers because odd numbers are considered unlucky, and 4, which sounds like 'death' is also avoided.
  5. Allow the jelly to cool for a few minutes before putting it in the fridge to set.  Konnyaku jelly sets very fast, and would be ready in about an hour's time.
  6. Remove from mould and serve the fish in pairs... again, the whole idea of even numbers.
I hope you'll try this dessert soon, because not only is it easy to make, sounds good, it's also good for the body too.  The Osmanthus has a light peachy fragrance, and is suppose to be good for the skin, aids digestion, and has a calming effect on the consumer.  Wolfberries are good for the eyes and boost the immune system... and Konnyaku is a high in fiber, aids digestion and apparently has the ability to clean toxins in the intestines.  Therefore, it's the perfect food for the CNY festivities!

Here's wishing everyone a blessed, healthful New Year! :)

Tuesday, 17 January 2012

Pineapple Tarts

The Sign that Chinese New Year is upon us!
The reason for my video on the rubbing in method with a pastry blender is simple - I've been making pineapple tarts! :)

I can't remember when I began making pineapple tarts for Chinese New Year, but I know that the recipe that I've only ever used is the one belonging to Joyce aka Dutchess-of-Cookalot.

She has a recipe for the pineapple jam, but I prefer to use the ready-packs available at Phoon Huat, and tweak them.

But her recipe for the pastry!!! OH!

I love her pastry recipe for its simplicity and result.  There are so many recipes out there with ingredients like custard powder, milk powder, corn flour, and even cheese!  And in a myraid of teaspoonfuls and half teaspoonfuls that clutters what is a very simple shortbread pastry.

The whole pineapple tart eating experience after baking these all these years is simple:
Enough crunch and crumbly buttery pastry, to enhance the chewy, fragrant, sweet-sourish, sticky mouthfeel of the pineapple jam.  A hint of spices hits the nose.  And all in one satisfying mouthful of pineapple tart.

The effort put into such a satisfying endpoint is certainly worth it.  And with a bit of organisation, making these wonderful festive biscuits isn't that difficult.

The Pineapple Jam (To be prepared a day in advance)
Ingredients:
1 packet AAA Pineapple Paste from Phoon Huat (This gives a sweet-sourish taste)
1 packet Premium Pineapple Paste from Phoon Huat (This gives a smoother texture to the overall jam)
2x 1.5" sticks of Cinnamon
10 cloves
1 Star Anise
Hot Water (about 1/2 cup - depends on how firm you want the overall jam to be)

Method:

  1. Mix all the ingredients in a large microwave safe bowl.  I use a pastry cutter to mix my ingredients because of the hot water, and when it's sufficiently cooled, I get my hands in there to squish the jam and spices together.
  2. Microwave the mixture for about 3 minutes to get hot, but not cooking.  Then leave it aside to cool down.
  3. Put it in the fridge overnight for the spices to enhance the jam further.


Once that's done, I roll 1 measuring teaspoonful of the jam, making sure to remove any black bits (stems of the pineapples) or spices that might be in the jam.  These pineapple balls are put onto a large tray, in neat rows, and then the tray is wrapped in clear plastic before returning to the fridge.
Jam in neat rows, and all the other parts of the tarts in progress

The Pastry (To be made a day in advance)
I usually make the pastry a day in advance to give it sufficient time to rest.  Also, because the weather is hot, the pastry can be very tricky to punch out, so preparing the pastry ahead and allowing it to cool sufficiently is a good idea.

Ingredients:

340g Plain Flour
½ tsp Salt
1 tbsp Icing Sugar
250g Butter, cold (I used unsalted, but if you're using salted, you may reduce the amount of salt in the recipe)
1 Egg Yolk
25ml Ice-cold Water
1 tsp Vanilla Essence

Rolled Pineapple Jam

1 Beaten Egg+Water, for glazing

Method:

  1. Put salt in the bowl, then sift flour and icing sugar into it. Rub in cold butter until mixture resembles breadcrumbs (See video).
  2. Mix in the egg yolk, ice-cold water and essence. Mix well to form a dough. Place in a plastic bag or plastic box and chill in the refrigerator for at least 30 minutes.  I usually leave it overnight. 
  3. Roll pastry out to 0.5 cm thickness between 2 baking papers, and either cut out or punch out the pineapple tart mould with a tart cutter.  Place the tarts on a lined baking tray.
  4. Return the tart to the freezer to harden.  This way, when glazing with the egg wash, the tart doesn't lose its shape.
  5. After the egg wash, fill each piece of cut-out pastry with the rolled pineapple jam filling.  Lightly shape the pineapple jam so that it sits nicely in the pastry, and the tarts look uniform.
  6. Bake in preheated oven at 180°C for at least 20 minutes.  If you want a more golden look to the tarts, reduce the temperature to 170°C and continue to bake for another 5 minutes or until you achieve the colour you want.  Then remove the tray and allow the tarts to cool before storing in air-tight containers.
I use a punch mould.

After freezing the tarts, I apply an egg wash.  By the time the tarts are glazed, the pastry is softened by the heat.

After putting the pineapple jam balls on the glazed tarts, it's ready to go into the oven.

Ta-da!  Time to cool down and store in airtight boxes.

But beware of Knaves of Hearts, who will steal your tarts! ;)

Have a blessed year of baking and cooking and sharing your bounties with your family and loved ones! :)